
Access Rights tab is the view that enables admin user to give access to all other users, among those access rights is the Patient Access Rights.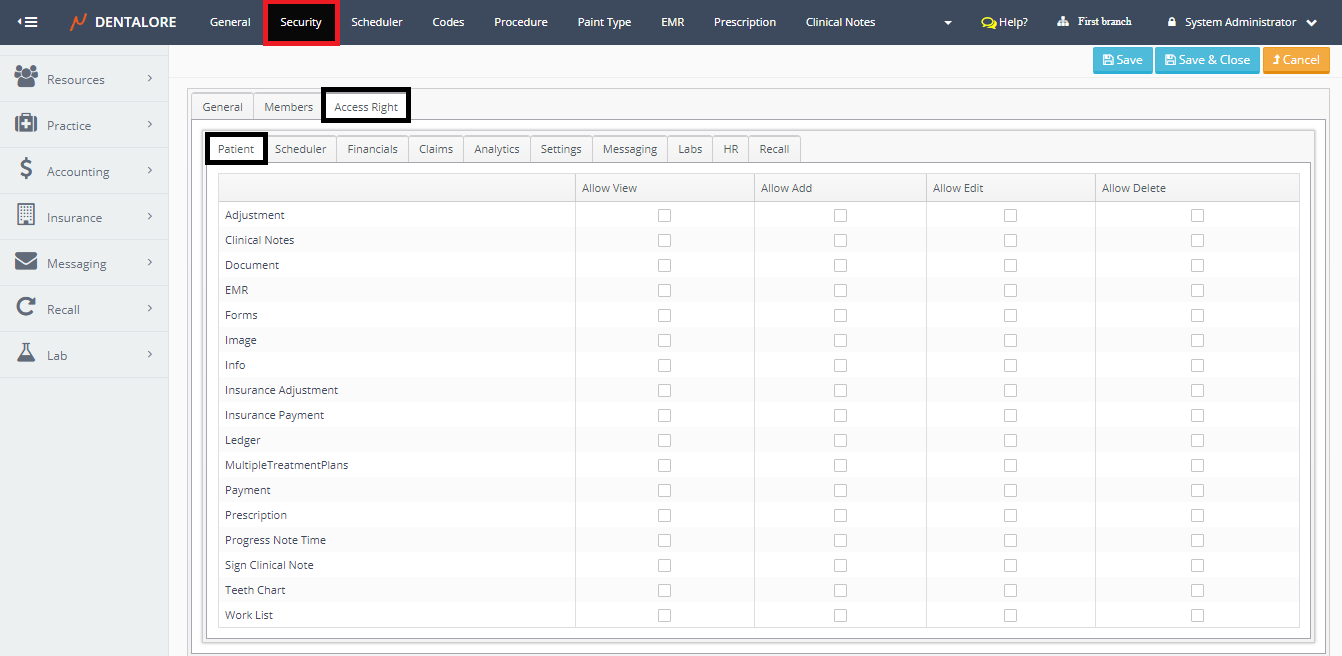
Patient Access Rights tab contains 17 items:
1- Adjustment
-- Note that In order to be able to perform any action related to the “Adjustment”, you must first own the access right of the Ledger view itself.
- Allow View: Displays the Adjustment Transactions in Ledger view.
- Allow Add: Allows user to add adjustments for each patient.
- Allow Edit: Allows user to update in the existing adjustment transactions listed in the Ledger view for each patient.
- Allow Delete: Allows user to delete any of the existing adjustment transactions listed in the Ledger view for each patient.
2- Clinical Notes
-- Note that In order to be able to open the Clinical Notes tab and write Clinical Note, you must first own the access rights of the Chart view itself.
- Allow View: Displays the Patient’s Clinical Notes tab in Chart View.
And also allows user to print existing signed clinical notes. - Allow Add: Allows user to add new clinical notes for patients and also to add addendums for the signed clinical notes.
>> ‘Add’ button appears in the clinical notes tab. - Allow Edit: Ability to update in the added clinical notes of patients.
>> ‘Edit’ icon appears beside each of the listed clinical notes. - Allow Delete: Ability to delete any of the existing clinical notes of patients.
>> ‘Delete’ icon appears beside each of the listed clinical notes.
3- Document
- Allow View: Displays the Patient’s Docs View.
- Allow Add: Allows user to upload and scan documents.
>> ‘Upload’ and ‘Scan’ buttons appear in Docs view. - Allow Edit: Ability to update in the info of uploaded and scanned documents listed in the Docs view.
>> ‘View’ icon appears beside each document. - Allow Delete: Ability to delete the uploaded and scanned documents listed in the Docs view.
>> ‘Delete’ icon appears beside each document.
4- EMR
- Allow View: Displays the patient’s EMR View.
- Allow Add: Allows user to add alerts, allergies, and vital signs (EMR) for patients.
>> ‘Add’ button appears beside each section in EMR view. - Allow Edit: Ability to update in the alerts, allergies, and vital signs (EMR) of each patient.
- Allow Delete: Ability to delete in the alerts, allergies, and vital signs (EMR) of each patient.
>> ‘Delete’ icon appears beside each of the added alerts and allergies for patient.
5- Forms
-- Note that In order to be able to view and control the forms, you must first own the access right of the Document view itself.
- Allow View: Allows user to view (open) the existing forms listed in the Docs view.
>> “Eye” icon of opening the form appears beside each form in the Docs. - Allow Add: Allows user to add forms.
>> “Forms” drop down button appears in the Docs view. - Allow Edit: Ability to update in the info of existed form in the Docs view.
>> ‘View’ icon appears beside each form in Docs view. - Allow Delete: Ability to delete the uploaded and scanned documents listed in the Docs view.
>> ‘Delete’ icon appears beside each form in the Docs view.
6- Image
- Allow View: Displays the Patient’s Images View (with both the “Viewer” and “Capture” tabs).
And displays the “Images” tab in the Patient’s Chart View. - Allow Add: Allows user to upload and/or scan new images for patient and also allows user to create (add) new devices from the “Device Manager” button in Capture tab in Images View.
>> Selecting Images section appears in the Capture tab.
>> Allows user to access the “Device Information” page for adding new device. - Allow Edit: Display the editing tools (Brightens, Contrast, Invert, Color Map, and Reset) in the Viewer tab in Docs Module. And also enables user to update in the “Device Information” of listed devices from the “Device Manager” view.
- Allow Delete: Ability to delete any of the patient’s images displayed in the Viewer tab. And also enables user to delete any of the listed devices in the “Device Manager” view.
>> ‘Delete’ icon appears with the editing tools bar in the Viewer tab .
7- Info
- Allow View: Displays the Patient Module, the “Patient List” View and each of the “Overview” and “Info” patient’s views.
- Allow Add: Displays the “Add Patient” View under the Patient Module and the “Add” button in the Patient List grid view; in order to allow user to add new patients.
- Allow Edit: Ability to update in the patient’s info page and save these updates.
>> “Save” and “Save & Close” buttons displayed in the ‘Edit Patient’ page. - Allow Delete: Ability to delete any of the existing patients from the ‘Patient List’ grid view or from the ‘Edit Patient’ page.
>> “Delete” button displayed in the ‘Edit Patient’ page.
>> “Delete” icon displayed in the transactions column in the Patient List Grid View.
8- Insurance Adjustment
-- Note that In order to be able to perform any action related to the “Insurance Adjustment”, you must first own the access rights of both the Ledger and Claims views.
- Allow View: Has No effect.
- Allow Add: Allows user to add Insurance adjustments from the ‘Claim Details’ page in Claims view for each patient.
-- Note that in order to be able to add insurance adjustment transaction; you must own both of the “Allow View” and “Allow Add” access rights. - Allow Edit: Allows user to update in the Insurance adjustment transactions from the ‘Claim Details’ page in Claims view and from Ledger View for each patient.
>> ‘View’ icon appears beside the Insurance adjustment transactions in the Ledger view.
>> User is able to access the ‘Edit Insurance adjustment” page either form Ledger view or from the ‘Payments’ tab in ‘Claim Details’ page. - Allow Delete: Allows user to delete any of the Insurance adjustment transactions from the ‘Claim Details’ page in Claims view and from Ledger View for each patient.
>> ‘Delete’ icon appears beside the Insurance adjustment transactions in the Ledger view and in ‘Payments’ tab in ‘Claim Details’ page.
9- Insurance Payment
-- Note that In order to be able to perform any action related to the “Insurance Payment”, you must first own the access rights of both the Ledger and Claims views.
- Allow View: Has No effect.
- Allow Add: Allows user to add Insurance payments from the ‘Claim Details’ page in Claims view for each patient.
-- Note that in order to be able to add insurance payment transaction; you must own both of the “Allow View” and “Allow Add” access rights. - Allow Edit: Allows user to update in the Insurance payment transactions from the ‘Claim Details’ page in Claims view and from Ledger View for each patient.
>> ‘View’ icon appears beside the Insurance payment transactions in the Ledger view.
>> User is able to access the ‘Edit Insurance payment” page either form Ledger view or from the ‘Payments’ tab in ‘Claim Details’ page. - Allow Delete: Allows user to delete any of the Insurance payment transactions from the ‘Claim Details’ page in Claims view and from Ledger View for each patient.
>> ‘Delete’ icon appears beside the Insurance payment transactions in the Ledger view and in ‘Payments’ tab in ‘Claim Details’ page.
10- Ledger
- Allow View: Displays the Ledger View
- Allow Add: Has No effect
- Allow Edit: Has No effect.
- Allow Delete: Displays the delete icon for both of payment & Adjustment in Ledger view in Procedure Ledger Only.
For the Open Ledger; you could delete payment or adjustment records if you have the “Allow delete” of Adjustment & Payment access.
-- Note that the display of “View” and “Delete” icons in the transaction column in Ledger view is related to the access rights of (Allow Edit) of (Teeth Chart).
11- Multiple Treatment Plans
-- Note that In order to be able to display the Treatment Plans tab, you must first own the access rights of the Chart view itself.
- Allow View: Displays the Treatment Plans tab in Chart View.
- Allow Add: Allows user to add each of the following:
- New Treatment Plan.
- New Visit related to patient’s treatment plans (‘Visit’ button displayed in view).
- Create Pre-Authorization for insurance (‘Pre-Authorization’ button displayed in view). - Allow Edit: Allows user to update in the information of treatment plan (Not in the procedures listed in the treatment plan).
>> The ‘View’ icon appears beside the Treatment plan title at the upper right side of view.
>> The ‘View’ icon appears beside the procedures listed in the selected Treatment plan just to be able to access the “Edit Procedure” page but without updating any info in it.
-- Note that in order to be able to update and save new procedure’s info, you must own the access rights of “Allow View” of ‘Progress Note Time’ and “Allow Edit” of ‘Multiple Treatment Plan’ item in the Patient’s access rights tab. - Allow Delete: Allows user to delete the selected treatment plan.
>> The ‘Delete’ icon appears beside the Treatment plan title at the upper right side of view.
>> The ‘Delete’ icon appears beside the procedures listed in the selected Treatment plan to delete selected procedure.
12- Payment
-- Note that In order to be able to perform any action related to the “Payment”, you must first own the access rights of the Ledger view itself.
- Allow View: Has No effect.
- Allow Add: Allows user to add payments for each patient.
- Allow Edit: Allows user to update in the existing payment transactions listed in the Ledger view for each patient.
- Allow Delete: Allows user to delete any of the existing payment transactions listed in the Ledger view for each patient.
13- Prescription
- Allow View: Displays the Patient’s Prescription View.
à Moreover it controls the display of the “Active Drugs” section in the EMR View. - Allow Add: Allows user to add prescriptions for patients.
>> ‘Add’ button appears in the prescription main view. - Allow Edit: Ability to update and print the patients’ prescriptions listed in the prescription grid view.
>> ‘View’ and ‘Print’ icons appear beside each prescription in the prescription main view. - Allow Delete: Ability to delete patients’ prescriptions listed in the prescription grid view.
>> ‘Delete’ icon appears beside each prescription in the prescription main view.
>> ‘Delete’ button appears in the ‘Edit Prescription’ page.
14- Procedure's Financials
- Allow View: View Procedure’s Financials.
- Allow Add: No Effect.
- Allow Edit: No Effect.
- Allow Delete: No Effect.
– ‘Allow View’ is Checked, User can view the following:
® Fees Column in Chart Module.
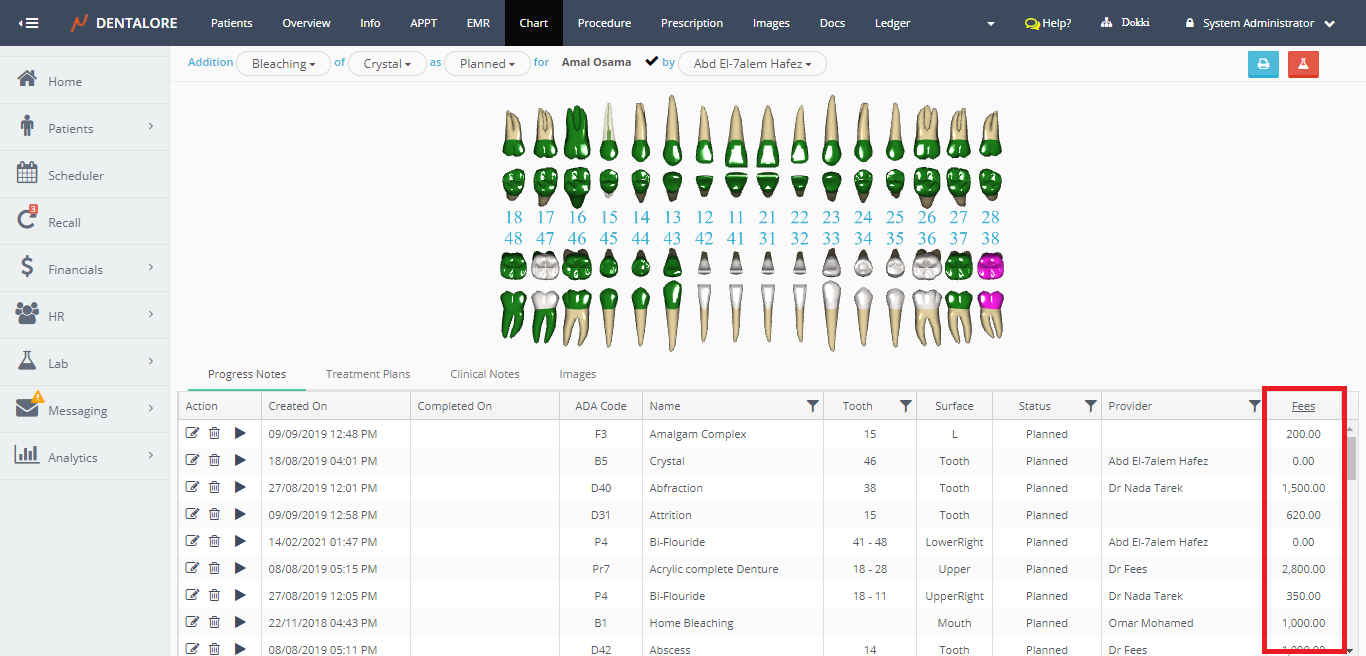
® Fees Column in Procedure Module.

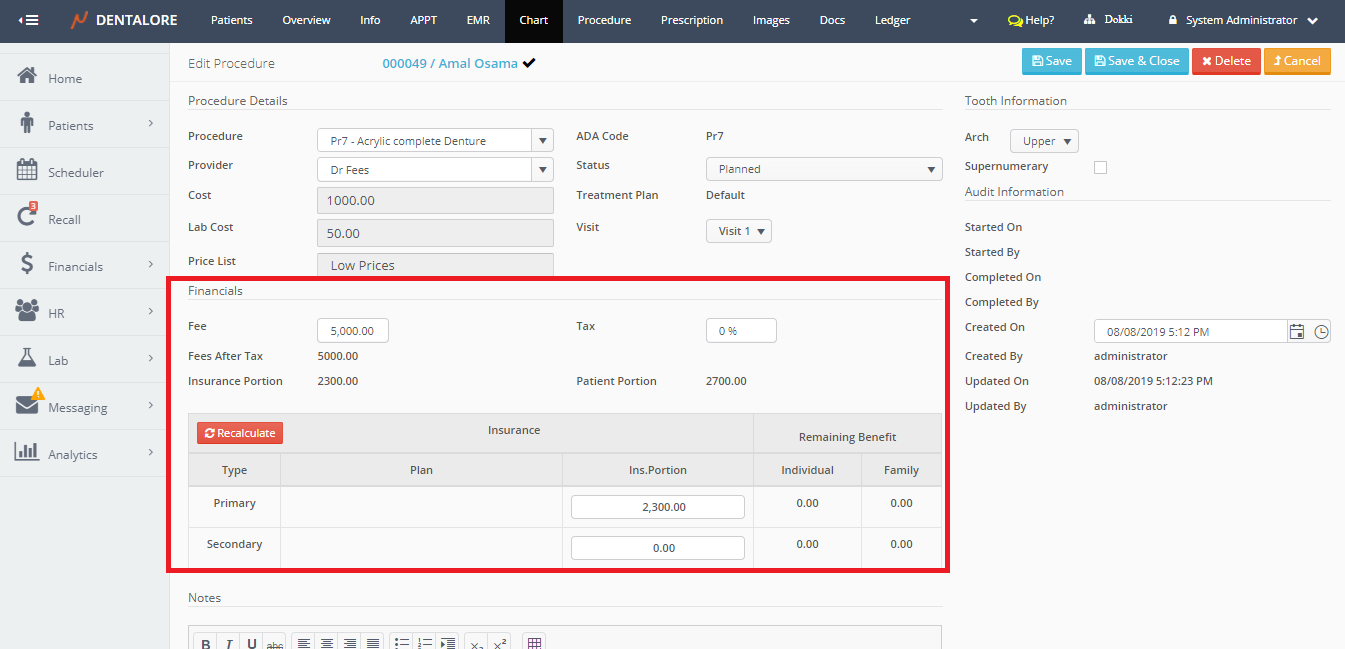
® Financials Section in Add Procedure and Edit Procedure Pages.
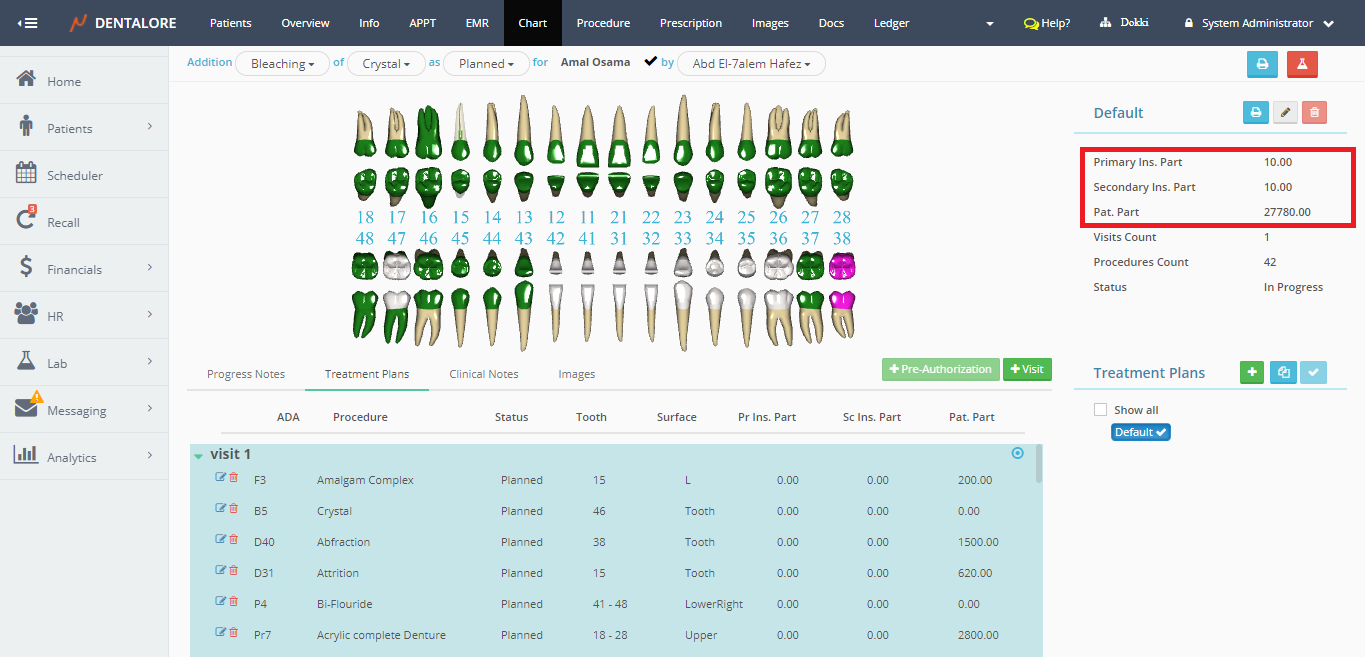
® Treatment Plan’s ‘Pat. Part’, ‘Pr Ins. Part’ and ‘Sec Ins. Part’ Columns.
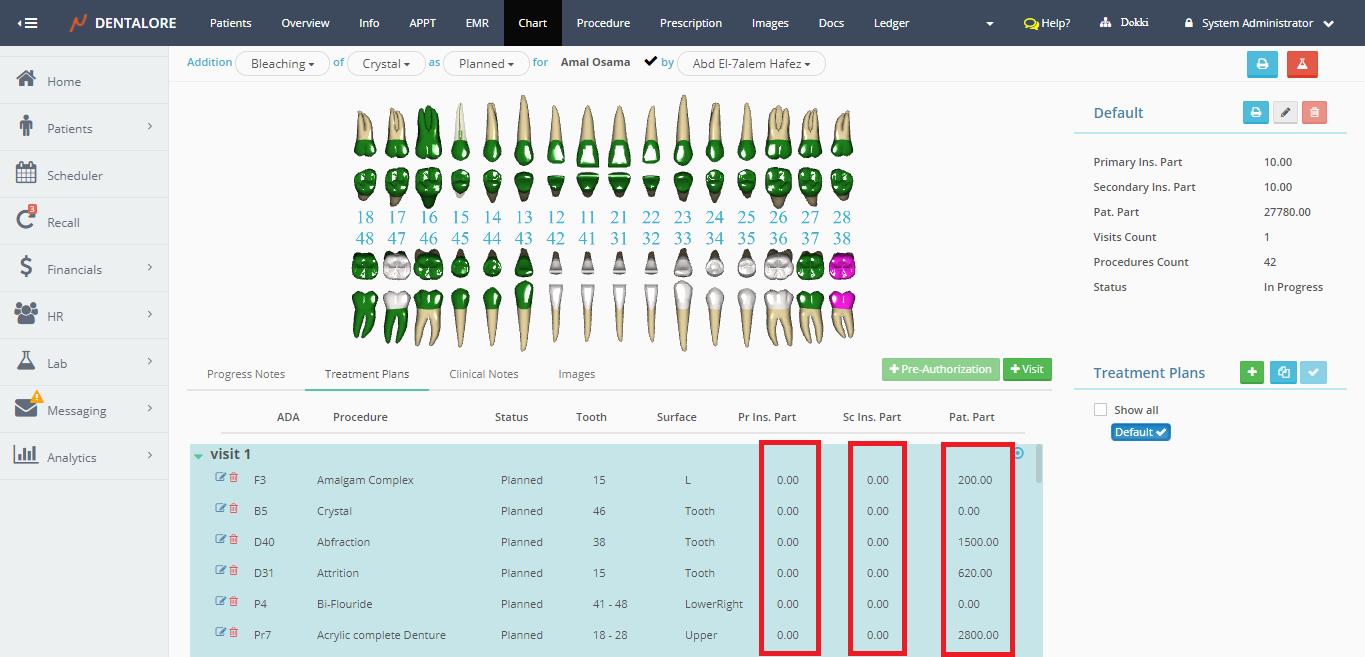
® Treatment Plan’s ‘Pat. Part’, ‘Pr Ins. Part’ and ‘Sec Ins. Part’ In Treatment Plan Details Section.
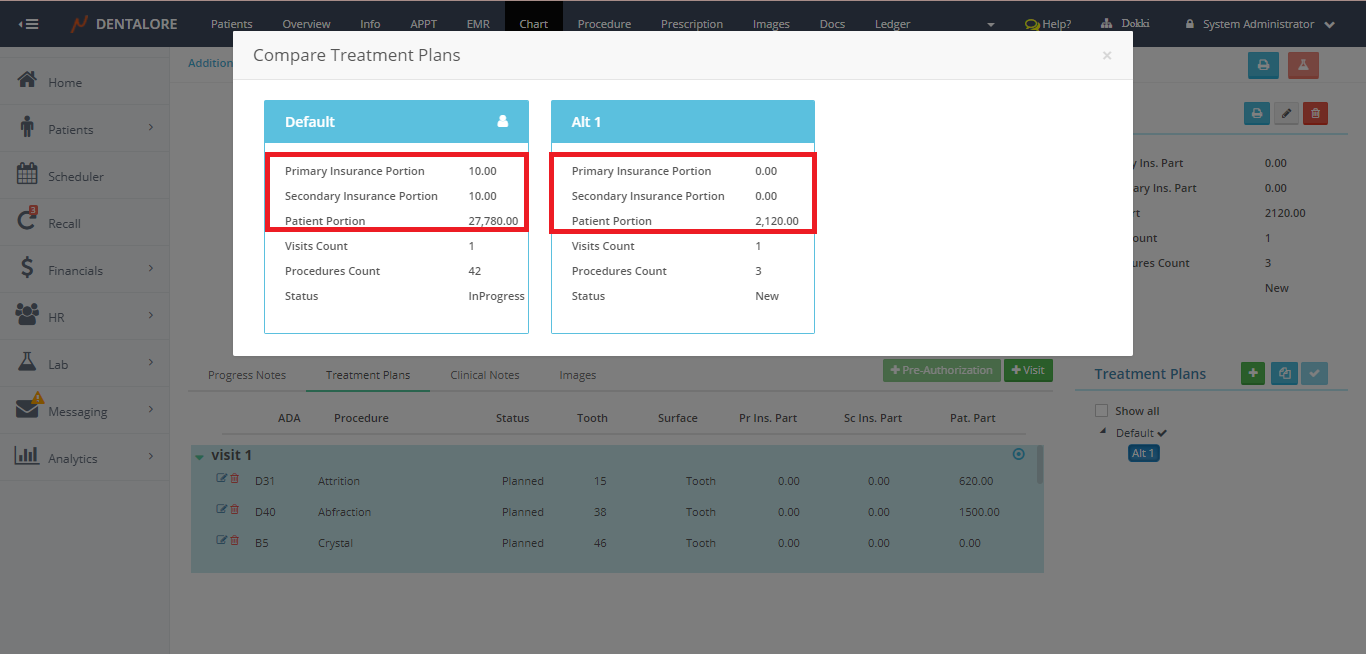
® Compare Treatment Plan Popup, Pat. Part’, ‘Pr Ins. Part’ and ‘Sec Ins. Part’.
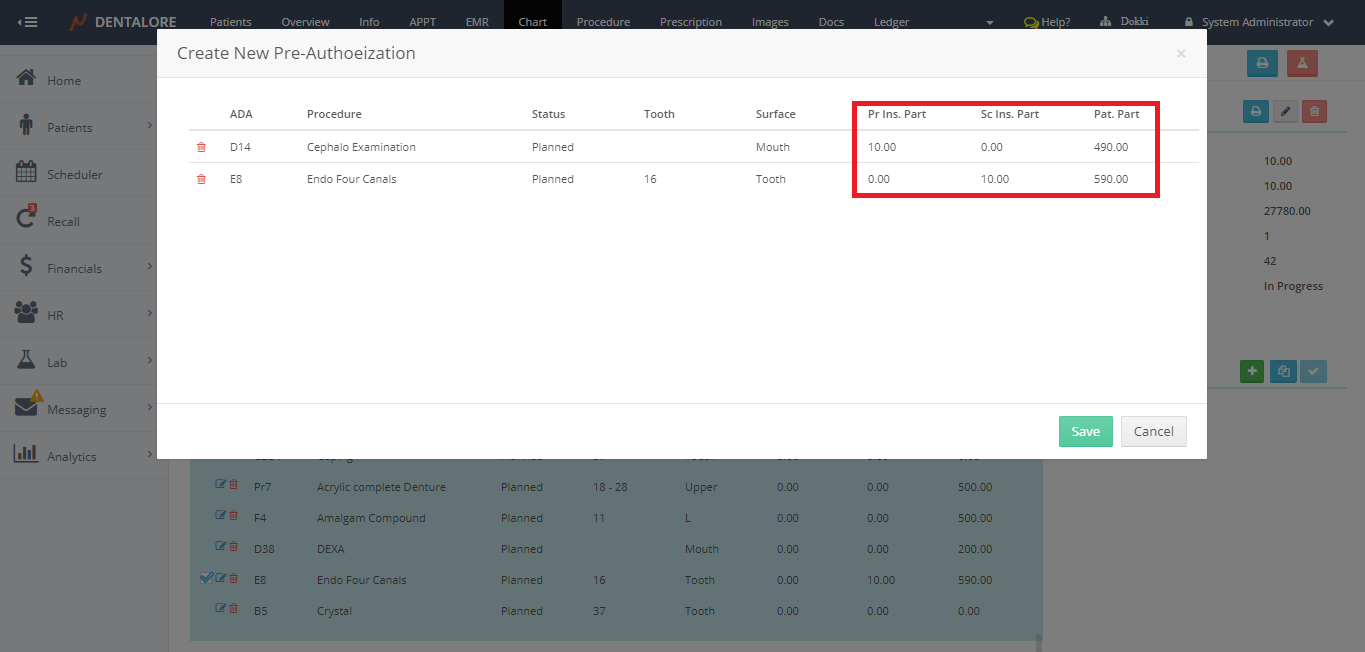
® Pre-Authorization Popup, Pat. Part’, ‘Pr Ins. Part’ and ‘Sec Ins. Part’.
® Treatment Plan Pre-Authorization Icon on hover Popup, ‘Estimate Value’ and ‘Original Value’.
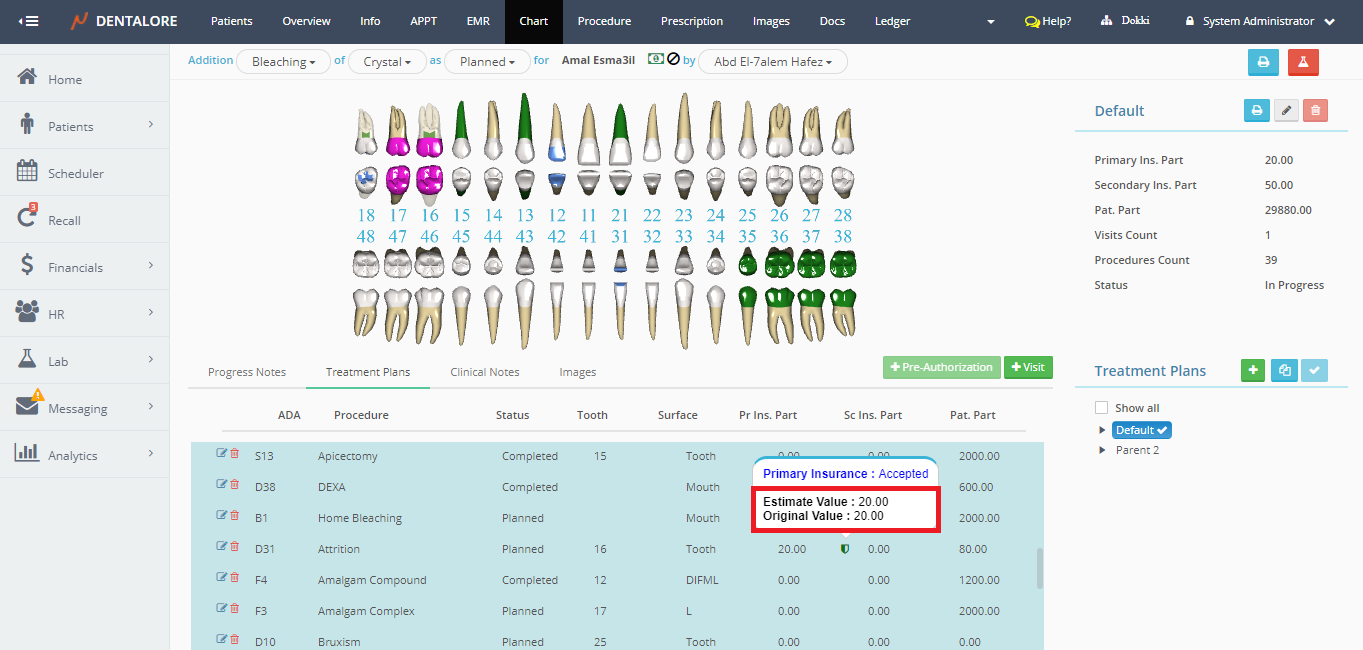
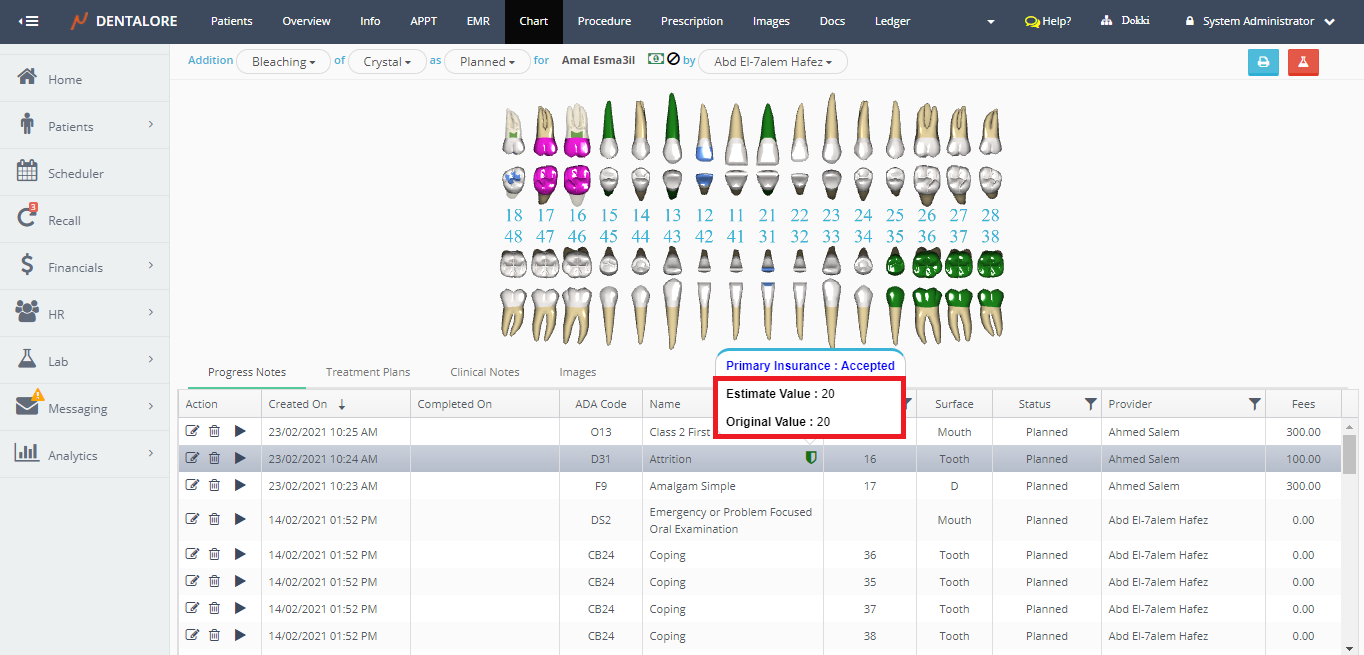
® Progress Notes Pre-Authorization Icon on hover Popup, ‘Estimate Value’ and ‘Original Value’.
15- Progress Note Time
- Allow View: Allows user to save the changes and updates done from the ‘Edit Procedure’ page that’s accessed from any view.
-- Note that in order to be able to update and save new procedure’s info, you must own the access rights of “Allow View” of ‘Progress Note Time’ item and;
-- The “Allow Edit” of ‘Teeth Chart’ to be able to update from Progress Notes tab in Chart View and from Ledger View.
-- The “Allow Edit” of ‘Multiple Treatment Plans’ to be able to update from Treatment Plans tab in Chart View. - Allow Add: Has No effect.
- Allow Edit: Has No effect.
- Allow Delete: Has No effect.
16- Sign Clinical Note
-- Note that the (Sign Clinical Note) feature is ONLY available for Providers Accounts.
And in order to be able to sign a clinical note, you must first own the access rights of the Chart view itself and then the Clinical Notes tab.
- Allow View: Has No effect.
- Allow Add: Allows user (Provider) to sign the existing unsigned clinical notes of patients.
>> ‘Lock’ icon displayed beside each clinical note in order to directly sign it.
>> ‘Save and Sign’ button appears in the ‘Clinical Note’ popup. - Allow Edit: Has No effect.
- Allow Delete: Has No effect.
17- Teeth Chart
- Allow View: Displays the Patient’s Chart View.
- Allow Add: Allows user to add procedures on the patient’s chart and from “Add Procedure” button in the Ledger view.
>> ‘Add Procedure’ button appears in the Ledger View.
à Moreover it controls the display of the “Start” and “Complete” icons in the transactions column in the Progress notes tab in Chart view. - Allow Edit: Ability to access the “Edit Procedure” page from the ‘Progress Notes’ tab in Chart view and from Ledger view, but without updating any field in the procedure’s page.
-- Note that in order to be able to update and save new procedure’s info, you must own the access rights of “Allow View” of ‘Progress Note Time’ item and the “Allow Edit” of ‘Teeth Chart’ in the Patient’s access rights tab. - Allow Delete: Ability to delete any of the existing procedures from the all tabs of Chart view and from Ledger view.
18- Work List
-- Note that in order to be able to start or end a visit from the worklist view, then you must own the access rights of “Allow Edit” of ‘Reservation’ in the Scheduler access rights tab.
- Allow View: Displays the “Work List” View under the Patient Module.
- Allow Add: Has No effect.
- Allow Edit: Allows provider to display his/her visits and visits of all other providers (Makes the Provider drop down menu enabled).
- Allow Delete: Has No effect.