Dentalore cloud system offers an Imaging module that enables user to upload images, capture images from Intraoral camera, Intraloral X-ray, Panorama…etc , as well a viewer option to display the captured images any time.
Moreover Dentalore System can transfers the patient’s information to the imaging modality software through bridges .
Images module is mainly divided into 2 tabs; the “Viewer” tab and the “Capture” tab.
Image module:
- Select Patient list from Patients module.
- Select required patient from patient list and Press “Images” module.
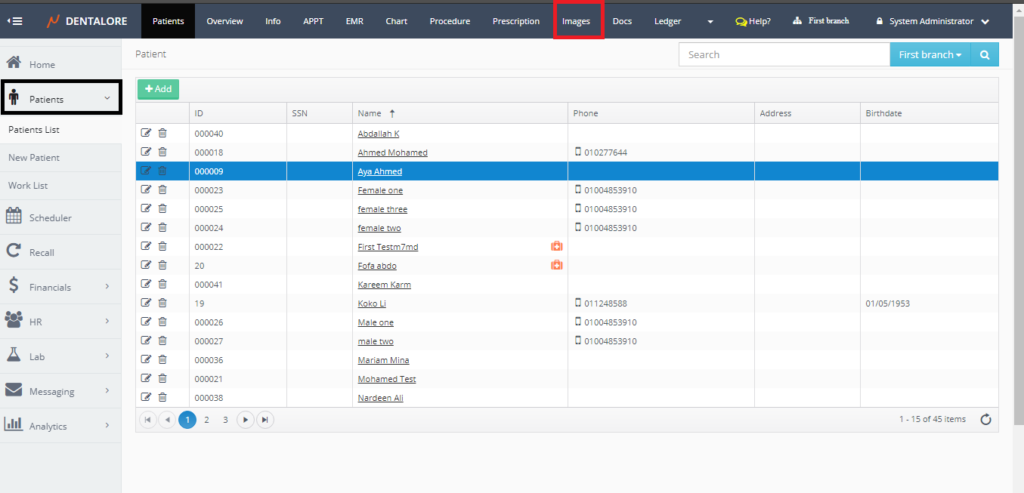
- Images tab opens by default on the Viewer tab that displays all images captured for the selected patient.
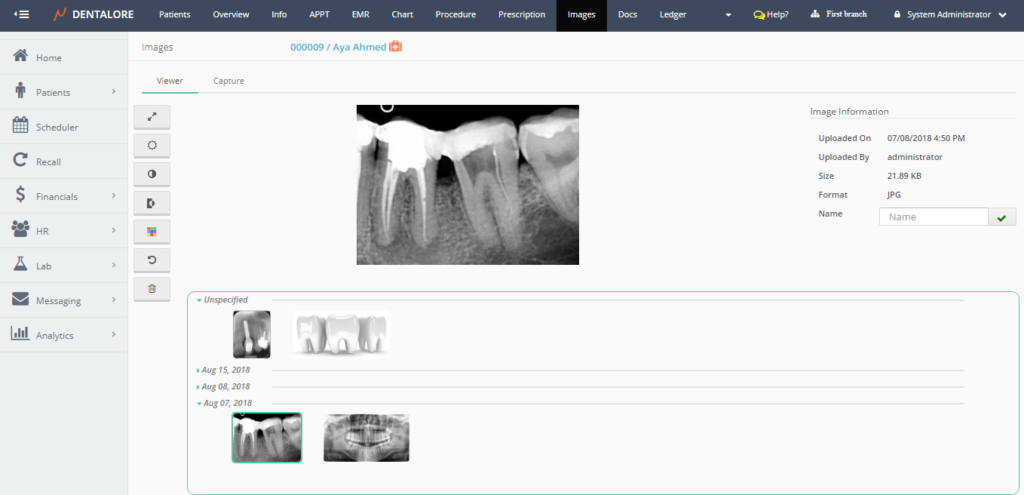

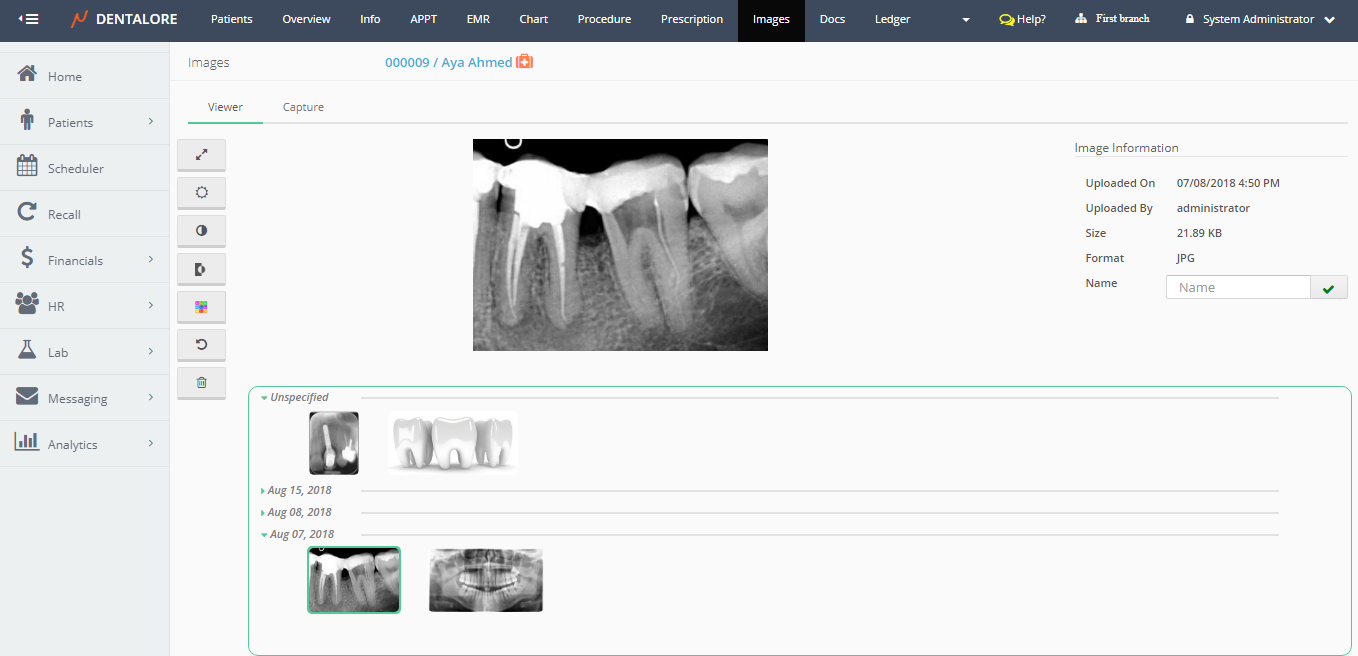
Viewer View
- Viewer tab contains the following features:
— Tools bar that includes some functions and processing options to be applied on images, like: (Full Screen, Brightness, Contrast, Invert, Color Map, Reset, and Delete) are the available options.
— Area to display the image in it.
— Image Information section: that contains information about the selected displayed image in the display area.
For more details on the viewer tab, Check: Images Viewer.
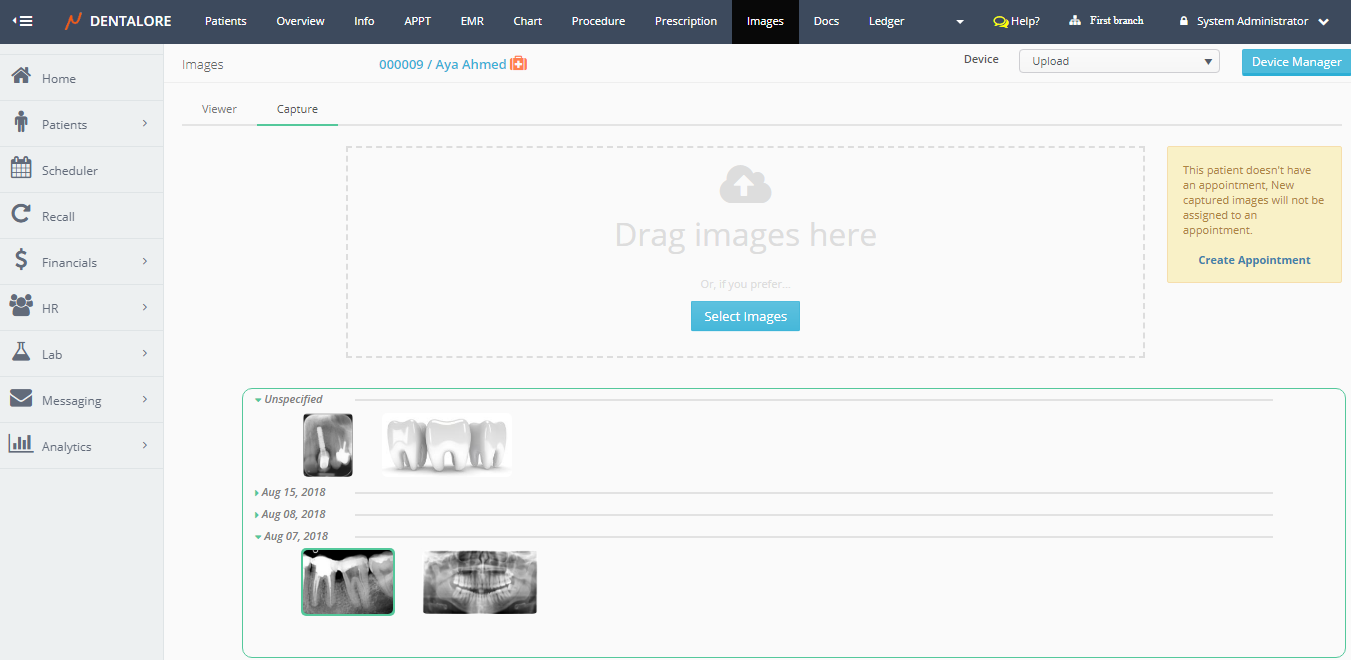
Capture View
- In order to upload or capture images, Press “Capture” tab.
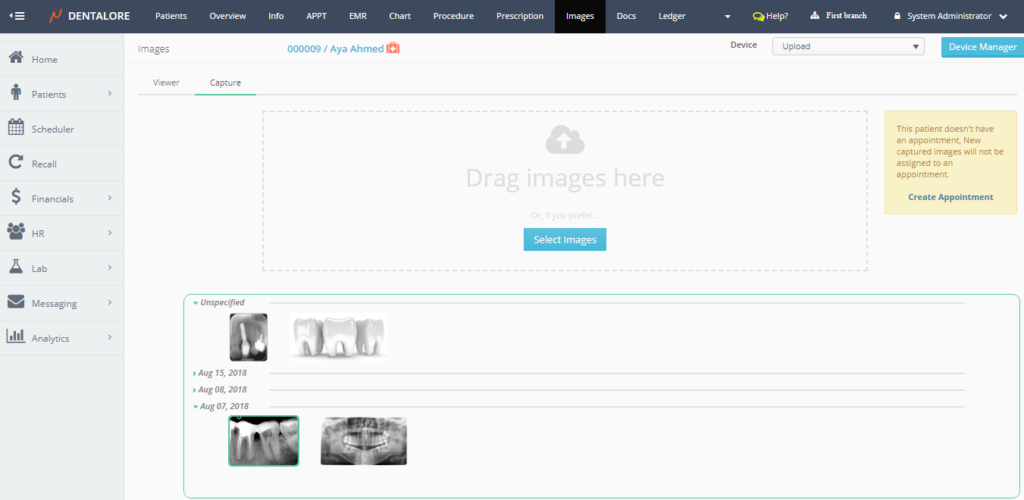
- Capture tab contains the following features:
— Device drop down menu: displays all of the configured and defined captured devices used to manage the adding of images for patients. By default “Device” contains only 1 option which is “Upload“.
— “Device Manager” button: Used to add and configure new devices.
For more details about devices that could be used in Dentalore system, Check: Configure New Devices for Capturing Images.
— “Select Image” button: Used to add images for the selected patient.
Note that: The “Select Image” button displayed only if the the selected device is “Upload”.
For more information about uploading images, Check: Upload Images.
— User could add an appointment (Visit) for the selected patient directly from the Images module to list the captured images under this visit in order to relate captured images with the visit.
For more details about creating an appointment, Check: Create Appointment from Images module.