In Dentalore system you have the ability to organize the procedures upon your need and classification, that you can add, edit and delete procedure categories and procedures included in each category.
Procedure
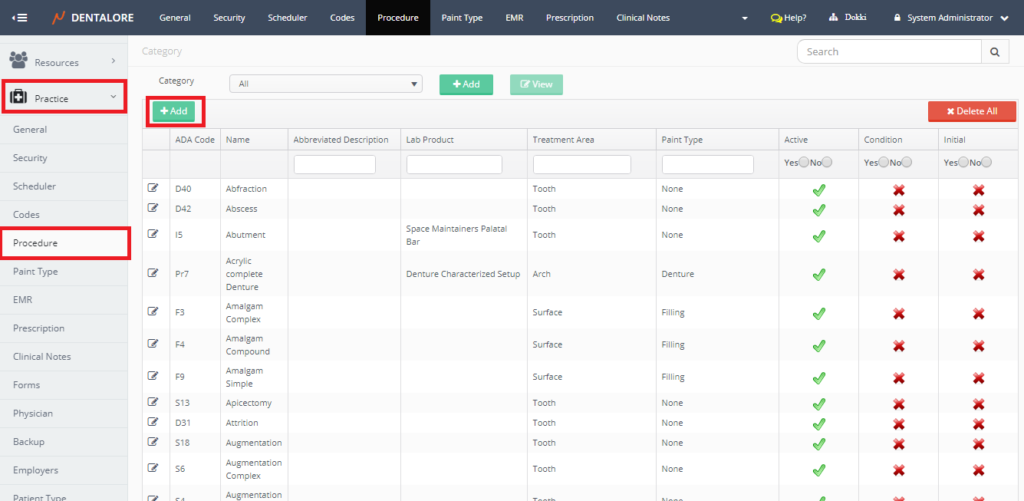
1) Add Procedure
- Press your name at the top right corner & Select Settings, new window will open.

- Expand Practice Menu and select “Procedures”.
- Press “Add” button in the grid view to add new procedures.
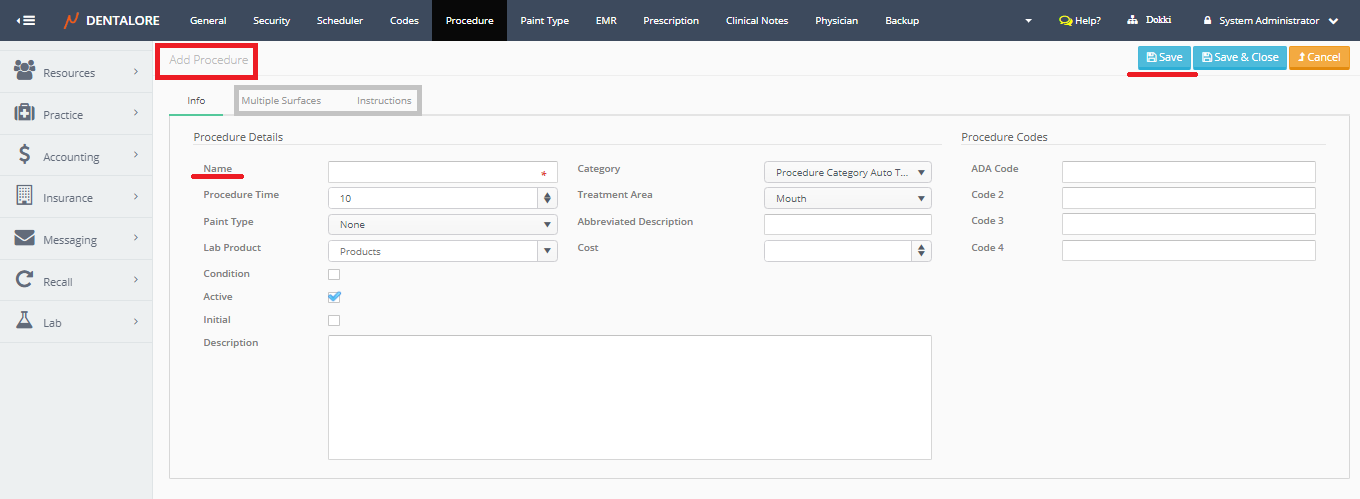
1.a) Info - New Page "Add Procedure" opens, where you should insert required info and save the new procedure.
Info page for adding a new procedures contains the following fields:
- Name: Is the name of the new procedure
- Category: Select the category in which this procedure will belong to it. Procedure category drop down menu contains all of the active defined categories.
- Procedure Time: It's the time considered to be taken for the procedure.
- Treatment Area: It's the place where the procedure is performed in the patient's mouth in which this place could be: (Mouth, Teeth, Surface, Quadrant, sextant, Arch, or Tooth range).
- Paint Type: It's the color and shape that the selected area will be painted by it once the procedure is selected for patient on his 3D teeth chart. For more details Check: Configure Paint Type
- Abbreviated Description: Is the abbreviated description for the procedure.
- Lab Product: Is a drop down menu that contains all of the defined lab products, used to link the procedure with a specific lab product; that once this procedure is selected then directly lab product added to it on the patient's 3D teeth Chart.
- Cost: Is the amount that the clinic cost to perform the procedure to patient, in other words this cost is not the fees of procedure that will be paid by patient, it's just the cost of procedure it self.
- Condition: Is a status that patient already has in this teeth. By default the "Condition" check box is unchecked.
- Active: Means that this procedure could be used and exist in all procedures drop down menus. By default "Active" check box is checked.
- Initial: Means that this procedure is done as an initial step or as a general examination for patient, that it will be listed in the initial procedures to be directly selected from patient's visit. By default the "Initial" check box is unchecked.
- Description: Type more information about the procedure.
- Procedure Codes: Includes (ADA Code, Code 2, Code 3, Code 4); in which the "ADA code" is the American Dental Association code equivalent for each procedure. While "Code 2", "Code 3", & "Code 4" are internal codes to be used upon clinic's needs.
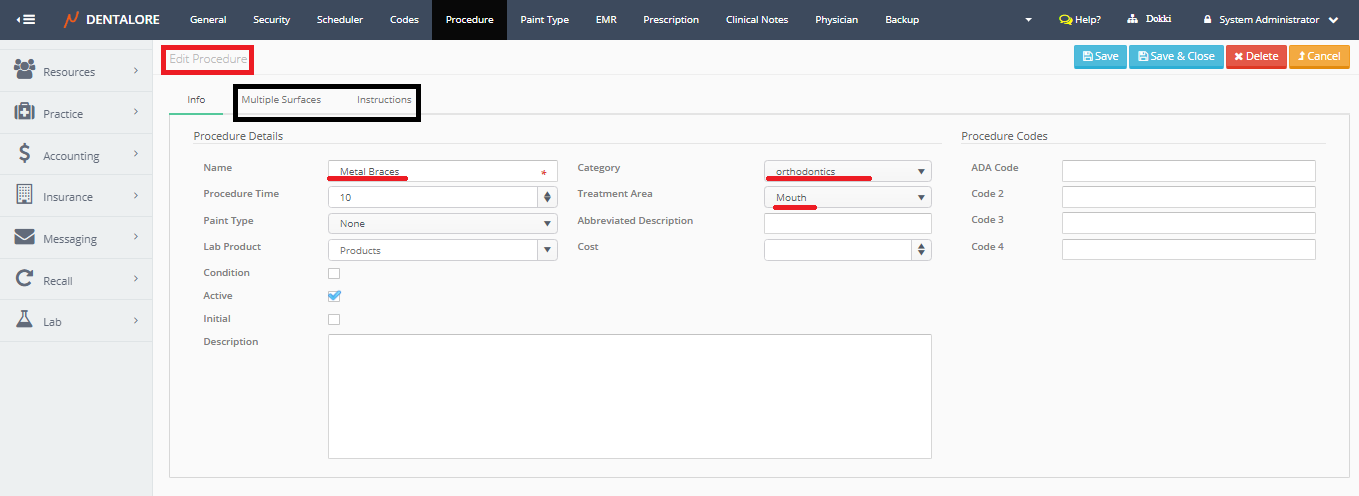
Note that: The (Multiple surfaces) and (Instructions) are disabled that you can't open them until the new procedure is saved. - After saving the new procedure, you will be in "Edit Procedure" page and now the (Multiple surfaces) and (Instructions) tabs could be opened.

- Open the (Multiple surfaces) and (Instructions) tabs to add required info in each.
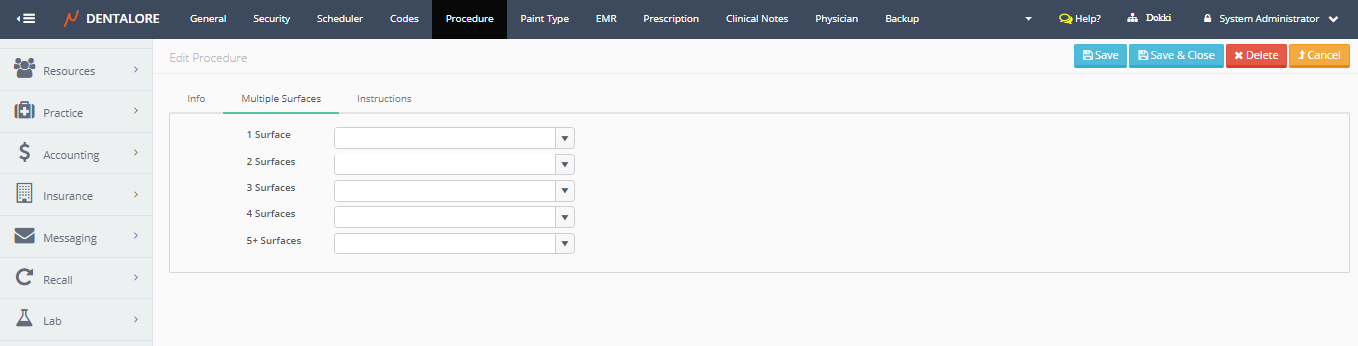
1.b) Multiple surfacesMultiple surfaces are applied on procedures that could be applied on many surfaces for the tooth.
- For example the "Amalgam" procedure is performed on the tooth surfaces', that you could select the procedure applied on each surface; if you work on 2 surfaces then the procedure added to patient is the one selected in (Surface-2) and so on. For more details, check: Multiple Surfaces Procedures
The (Multiple Surfaces) used if you want to divide the procedure on the 5 surfaces of the tooth that you select the action performed on each surface from here.1.c) Instructions - The (Instructions) tab is used to add instructions for the selected procedure to be directly sent to patient at starting, during or after performing this procedure via automatic messaging (SMS and/or Email).
-- Note that: After typing instructions in the field of any status, you must tick the check box of "Messaging" bellow each box in order to successfully sent automatic messages for your patients.
For more details check: Configure Automatic Message Rule for Procedures.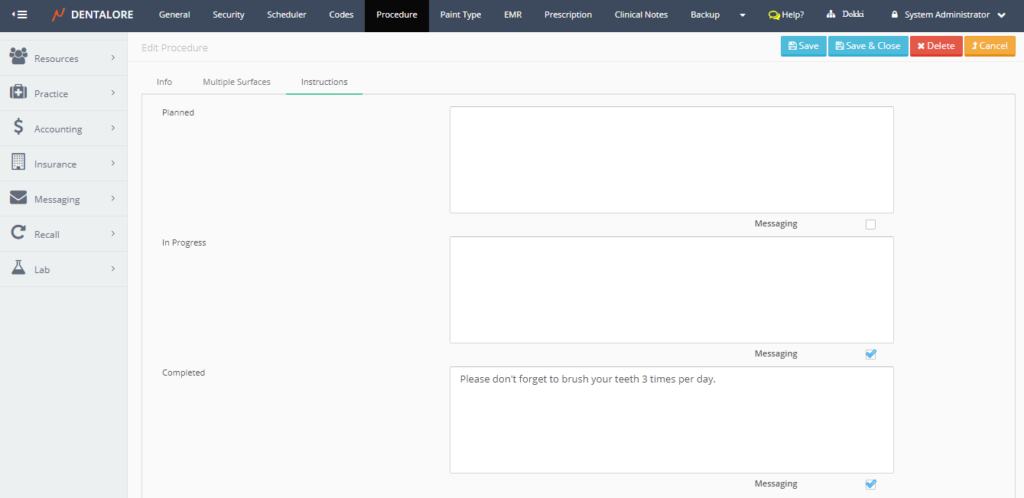


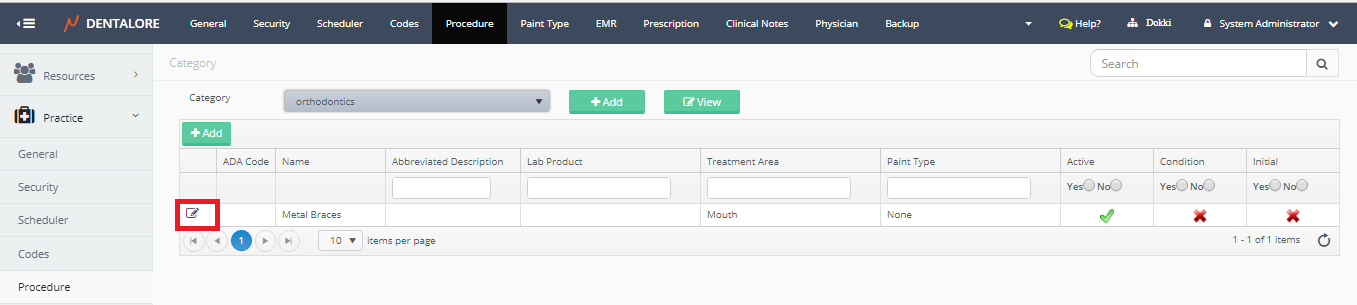
2) View Procedure
- In order to edit a specific procedure, press on the "View" icon beside the procedure in grid view of procedures. New window "Edit Procedure" opens to view or edit required fields.

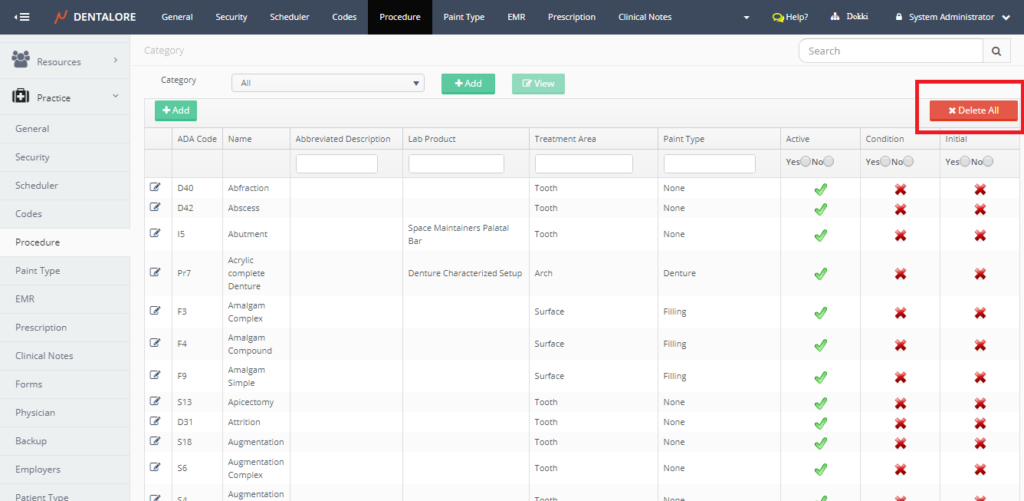
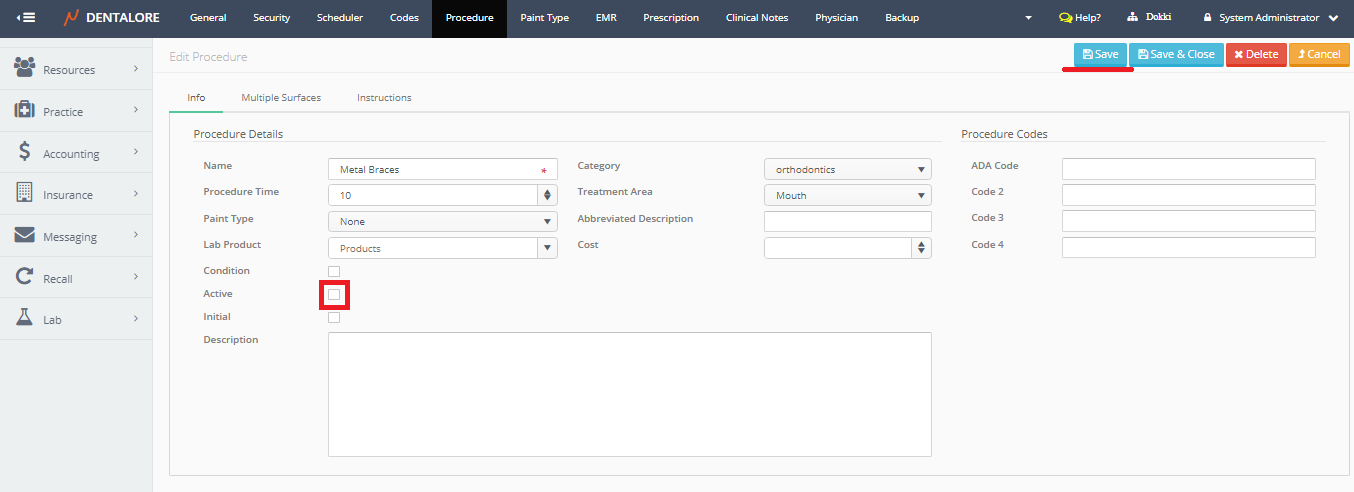
3) Delete Procedure
From the "Edit Procedure" page, you could delete the procedure; to delete procedure follow the following steps:
- Remove the check mark of the "Active" checkbox.
- Press "Save" button, then;

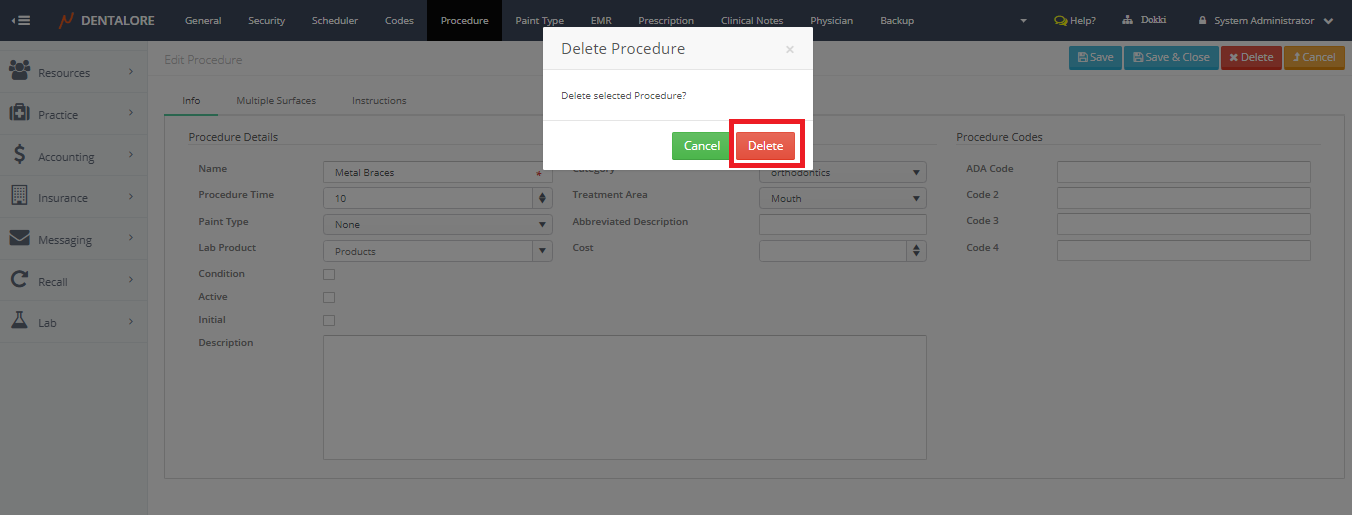
- Press "Delete" button, Popup "Delete Procedure" opens, Press "Delete" button in the popup.

After deleting the procedure, Popup closes & you will be directed to the main Procedures page. - Press “Delete All” button in the grid view to delete all procedures.