From Dentalore Cloud System user has the ability to configure many different rules that automatically manages the sending of messages (SMS and/or Email) to patients upon configured settings.
Configure an Automatic Rule for Patient's Changed Appointment Time
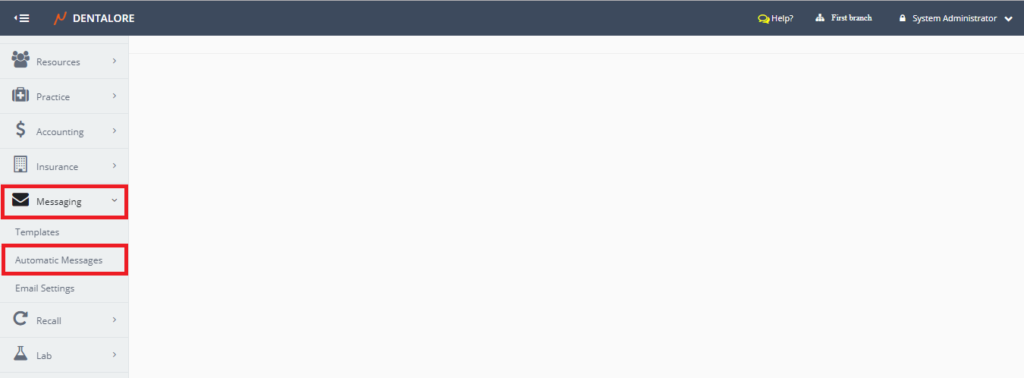
- Press your name at the top right side of the screen and Select Settings.

- Expand the “Messaging” menu and Select “Automatic Messages”.
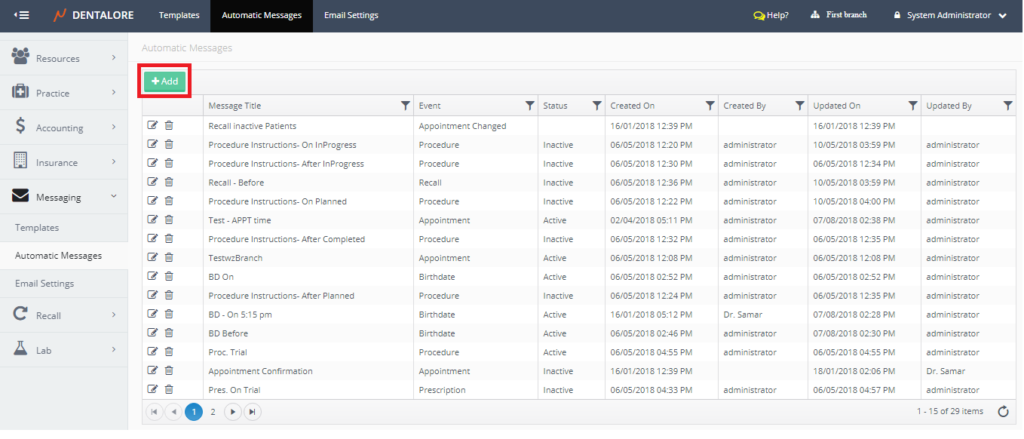
- Automatic Messages main page opens displaying all of the defined automatic rules and an "Add" button to add new automatic rule.
>> For more information about messages main page and data displayed in it, Check: Automatic Messages Main Page. - Press "Add" button.
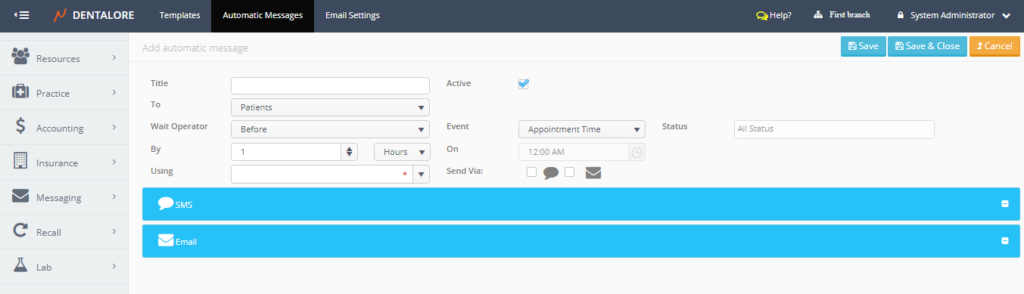
- New Page "Add Automatic Message" opens.


Create an Appointment Changed Time Automatic Rule
Fill in the the following fields:
- Title: Is the Name for the new created rule.
- For Ex.: Patient's Changed Appointment. - Active: Is a check box that's ticked by default which means that this rule can be used to send messages.
- To: Is a drop down menu to select for whom will this rule be send, User could select from 2 options: (Patients or Providers).
- Select 'Patients'. - Wait Operator: Is a drop down menu contains 2 options (On and After) depending on the selected 'Event': Appointment Changed.
-> Note that the options in 'Wait Operator' drop down menu appears depending on the selected 'Event'. - Event: Is a drop down menu that contains all of the defined events in Dentalore System that the user is able to send messages on them.
- Select 'Appointment Changed'.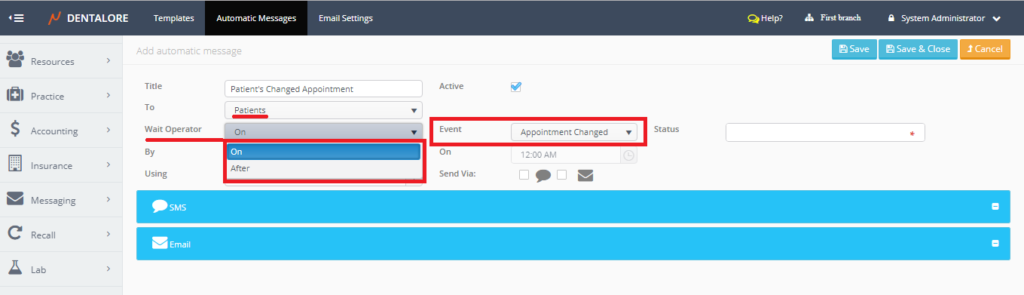
- User here have the ability to create Rule using 'Wait Operator':
1- On: Means that the rule will be sent once the patient's visit (Appointment) time changes.
-- Fields 'By' and 'On' are disabled when 'Wait Operator' is: On.
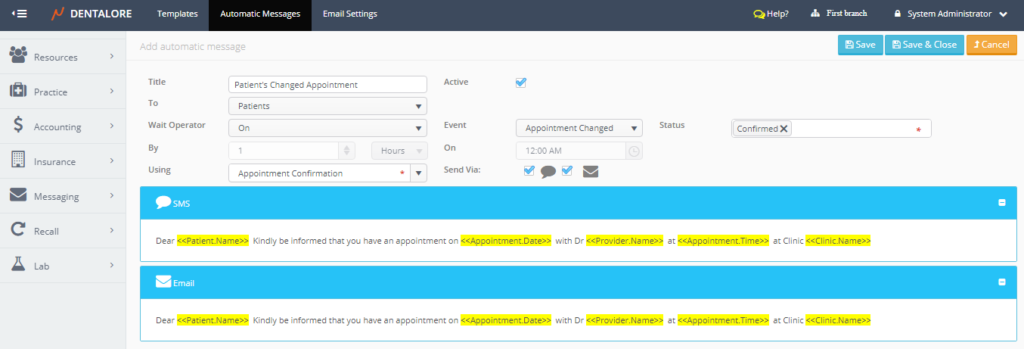
2- After: Means that the rule will be sent to patient after his/her visit (Appointment) time changes by time set form the 'By' field. - By: Enabled only when 'Wait Operator' selected to be: ( After) in order to select required time when to send the message. This time is selected by: (Hours or Days).
- On: Enabled only when the 'By' field selected to be by: Days, then 'On' field becomes enabled to set exactly when to send the message through the day.
- Status: Is an Auto-Complete drop down menu to select the required visit status that user want to send message for when it's time changed. Status could be one of: (Unconfirmed, Confirmed, Delayed, Checked In, In Progress, Completed, Checked Out, Cancelled, or Missed).
-> Note that user could only select one Status for each rule. - Using: Is a drop down menu contains all of the active defined templates in system in order to select required template that message will be send by.
- SMS: Is a Check box, that if checked that means the automatic rule will be sent via SMS & the SMS section opens displaying the message body.
- Email: Is a Check box, that if checked that means the automatic rule will be sent via Email & the Email section opens displaying the message body.
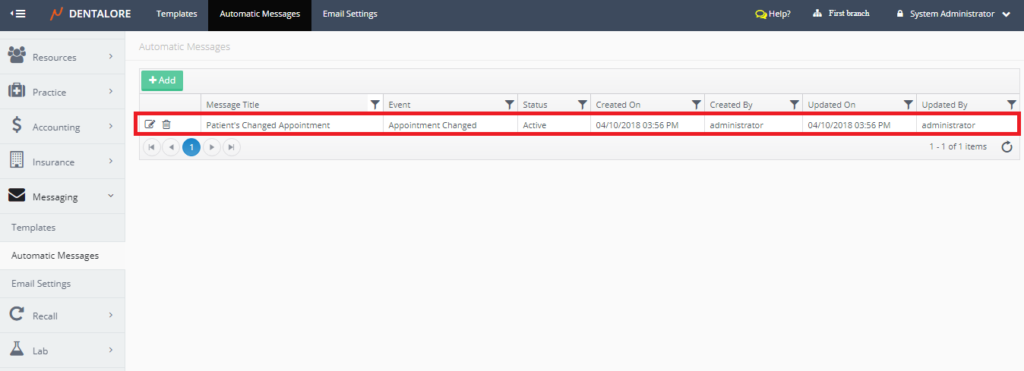
- Save the new rule then it will be listed in the 'Automatic Messages' main page.


Update Automatic Rule of Patient's Changed Appointment Time
- In order to update in rule, Press the "View" icon beside the required rule.
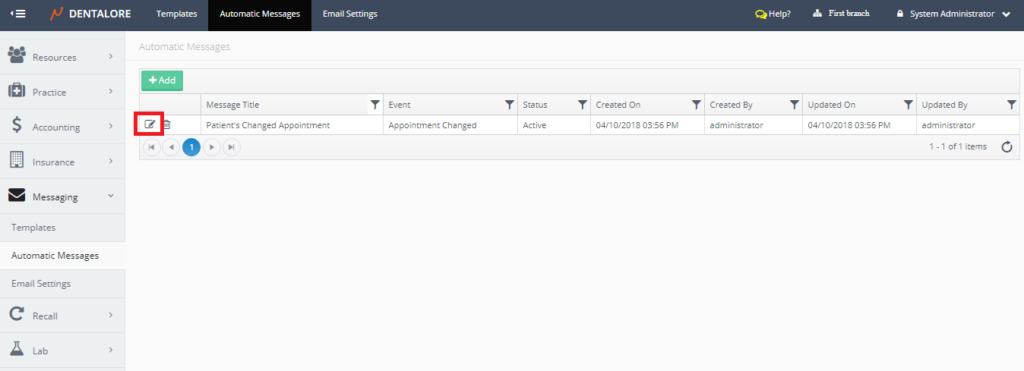
- New Page "Edit Automatic Message" opens to update any required field.


Delete Automatic Rule of Patient's Changed Appointment Time
Delete could be done by one of the following methods:
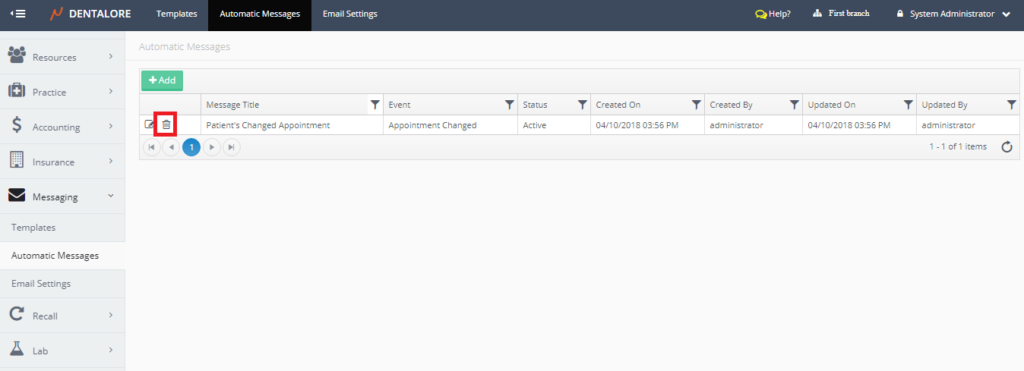
1- Directly from the "Delete" icon.
To delete Automatic Rule follow the following steps:
- Must Remove the check mark of the "Active" checkbox in the "Edit Automatic Message" page then "Save&Close".
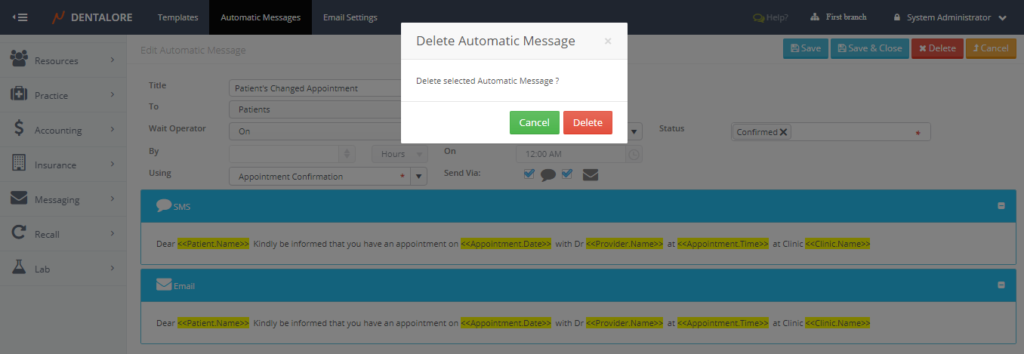
- Press "Delete" icon.
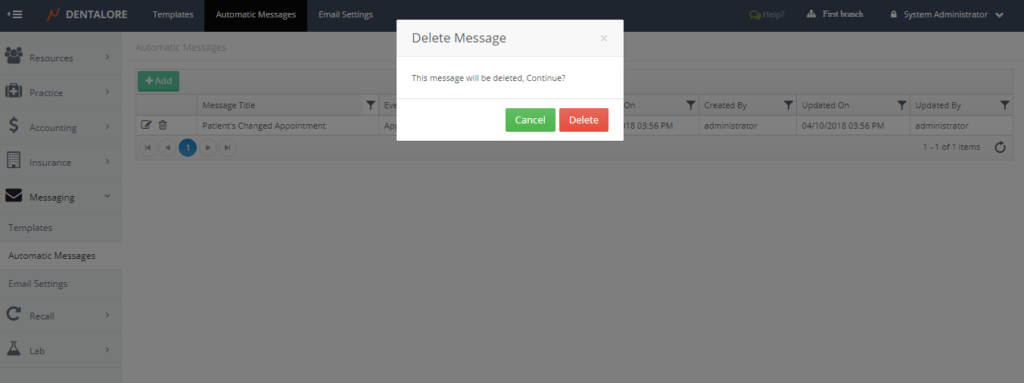
- Popup "Delete Automatic Message" opens, Press "Delete" button in the Popup.


2- From the "Edit Automatic Message" page.
To delete Automatic Rule follow the following steps:
- Remove the check mark of the "Active" checkbox.
- Press "Save" button, then
- Press "Delete" button, Popup "Delete Automatic Message" opens, Press "Delete" button in the Popup.