Recall is the module that enables the user to track patients’ recalls & follow up with them over an interval of time depending on many conditions.
One of the recall types is the "Appointment" recall type that works based on the completed visit of patients, in which specific patients will be recalled after their completed visits by a certain period of time (Interval).
Add recall of "Appointment" type
- Press your name at the top right side of the screen and select Settings.

- Select Recall Module.

- Press "Types" sub module, then Recall main page displayed.

- Press "Add" drop down button.
- Select "Appointment" type.

- New Page "Add Appointment Recall" opens.
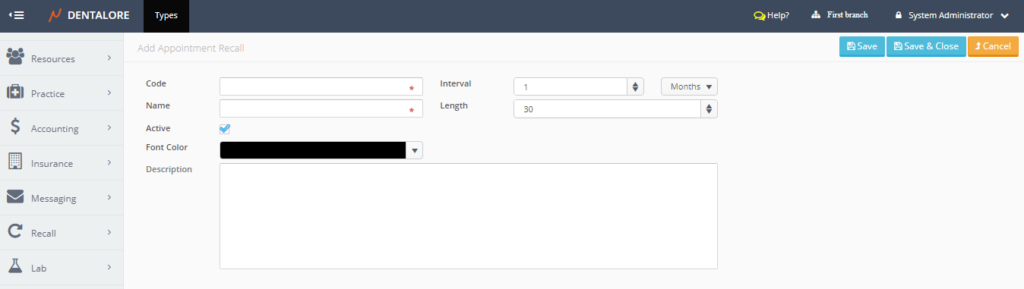
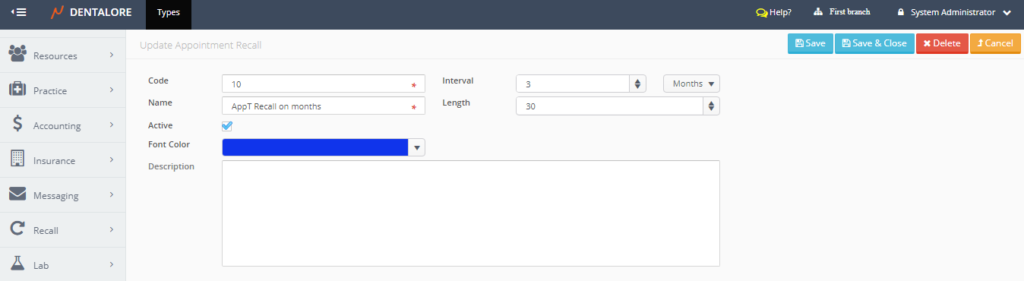
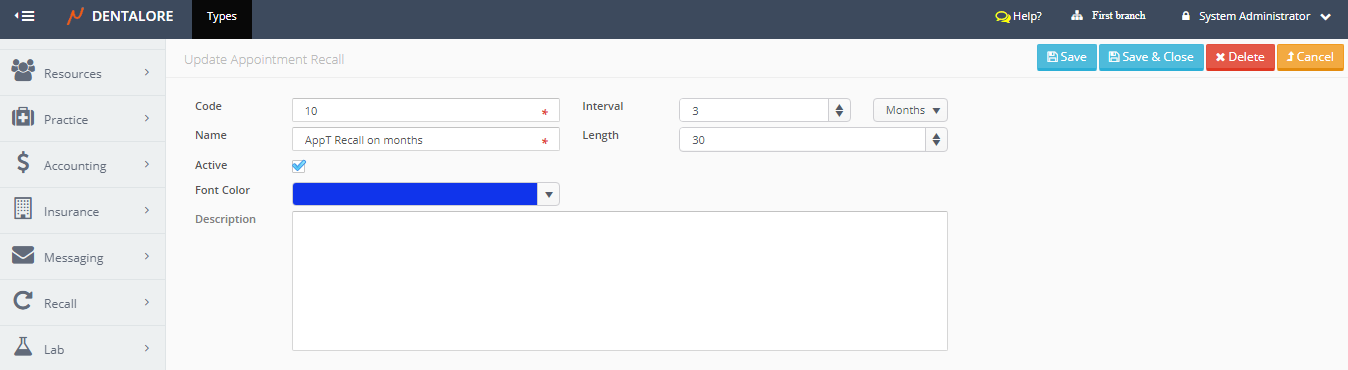
- "Add Appointment page" contains the following fields:
-- Code: Is the unique code (ID) for the new created recall and it's a mandatory field.
-- Name: Is the name of the new created recall and it's a mandatory field.
-- Interval: Is a numeric box of minimum value = 1 and maximum value = 360 in order to set the period of time required to recall the patient after it passes. Period of time could be within: Days, Weeks, Months, or years.
>> By default the interval selection is set to 1 Month.
-- Length: Is the length of visit created as a result of this recall rule.
-- Active: Is a check box, that's ticked by default and means that this recall rule is active and can be used to recall patients based on it. If "Active" check box is un-ticked that means recall rule is inactive and can't be used to recall patients.
-- Font Color: Is the color of new created appointment recall that will be displayed in it in the "Recall List" view.
-- Description: Is a field to type any notes or more description on the new created recall.
-- "Save" button: New "Appointment" recall will be successfully saved and user will be directed to the "Update Appointment Recall" page.
-- "Save & Close" button: New "Appointment" recall will be successfully saved and user will be directed to the "Recall" main page.
-- "Cancel" button: New "Appointment" recall will not be saved and user will be directed to the "Recall" main page. - Insert the mandatory fields (Code & Name), Select interval required, save and check that the new created appointment recall listed in the "Recall" grid view.

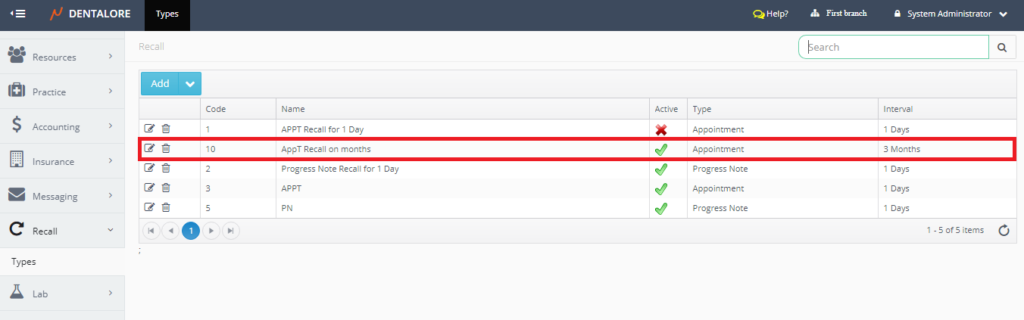
>> Appointment Recall successfully added and listed in the "Recall" grid view.


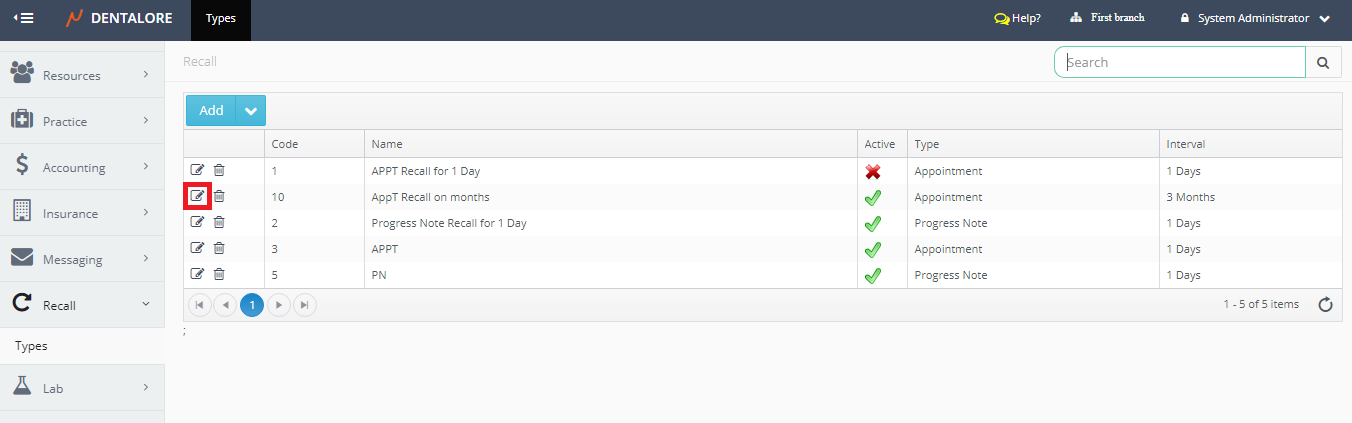
Update Recall
- Press "Edit" icon beside the required recall.
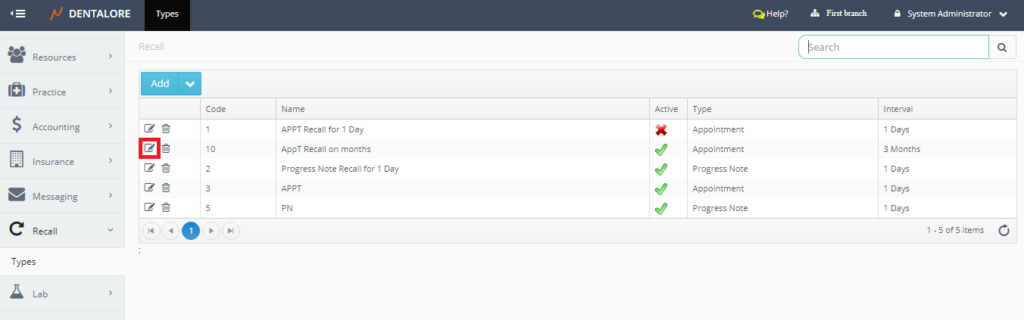
- New page "Update Appointment Recall" page opens.
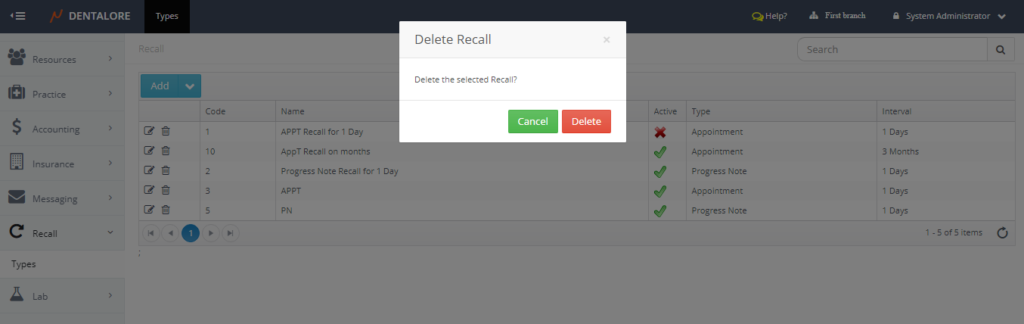
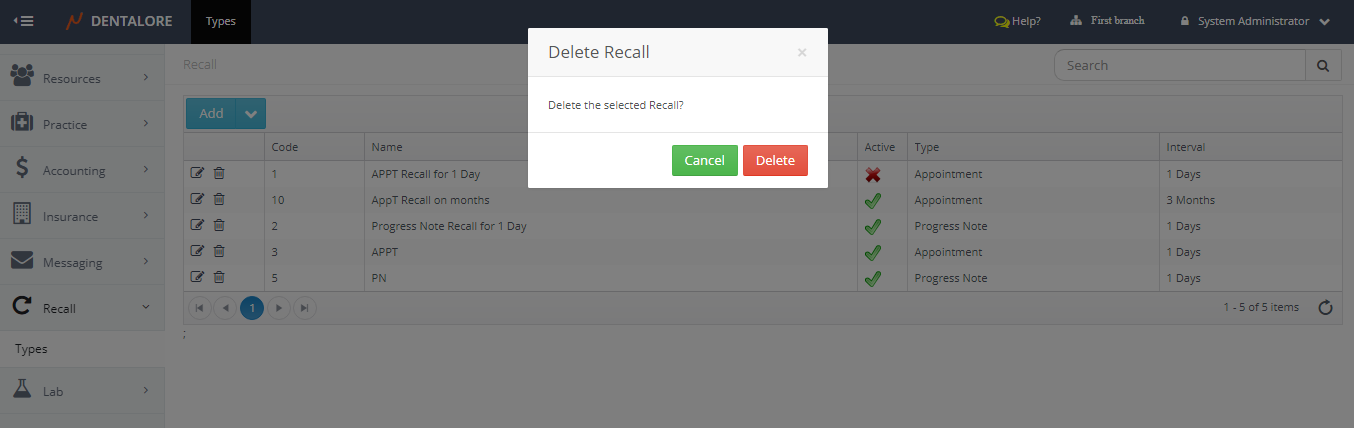
Delete Recall
User could delete recall type by 2 ways:
1- "Delete" icon in the "Recall" main page.
- Press "Delete" icon beside the required "Appointment" recall.

- New Popup "Delete Recall" opens.

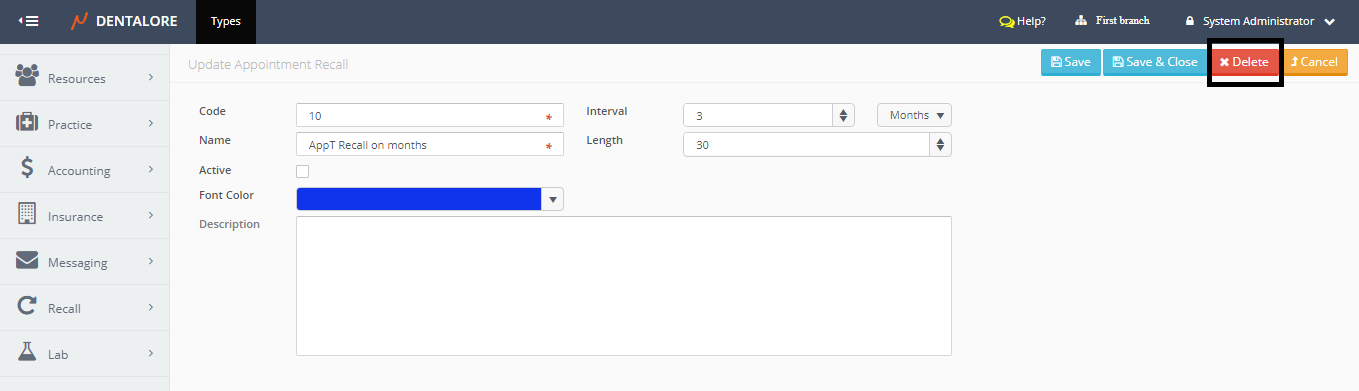
2- "Delete" button in the "Update Appointment Recall" page.
- Press "Edit" icon beside the required recall.
- New page "Update Appointment Recall" page opens, Press "Delete" button.

- New Popup "Delete Recall" opens.
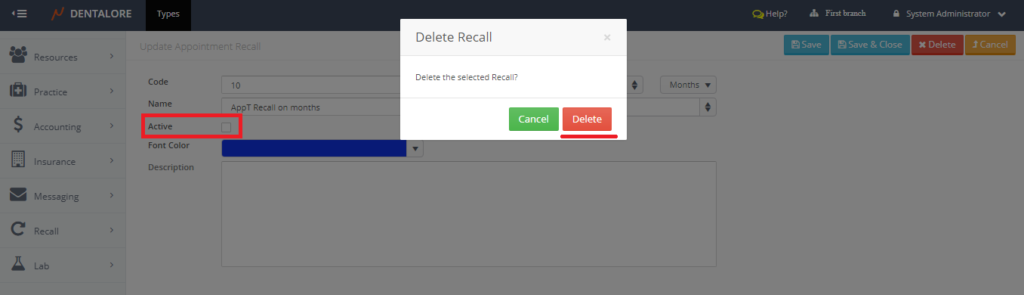
- >> Note that in order to delete any recall, this recall must be of status "Inactive".
- From the "Delete Recall" popup, if user press "Delete" button, then the recall will be deleted. And if user press "Cancel" button, then the recall will not be deleted and still listed in the "Recall" grid view.