Bridge Protocol is almost used with imaging modalities that support different types of bridges, like the Cone beam, Cephalometeric, … etc.
To Configure a new device uses a Bridge Protocol, follow the following:
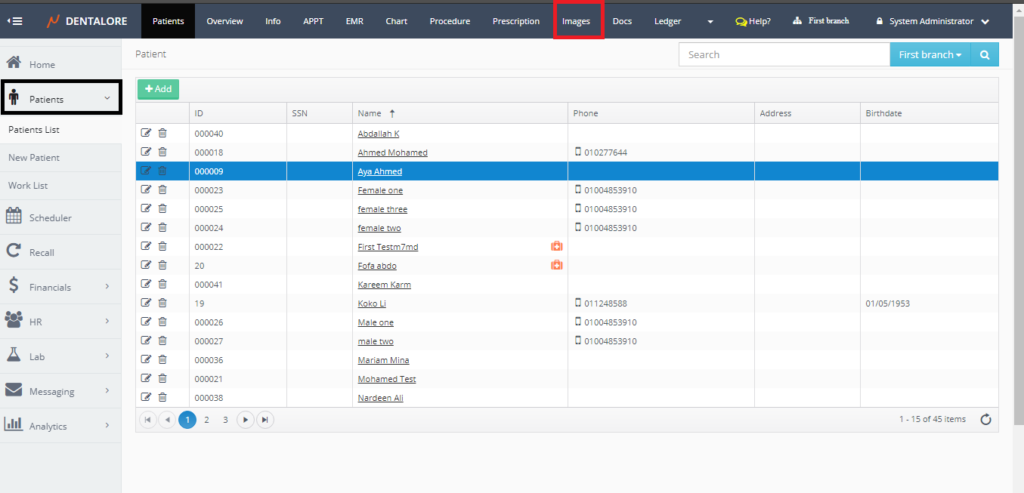
- Select Patient list from Patients module.
- Select required patient from patient list and Press “Images” module.
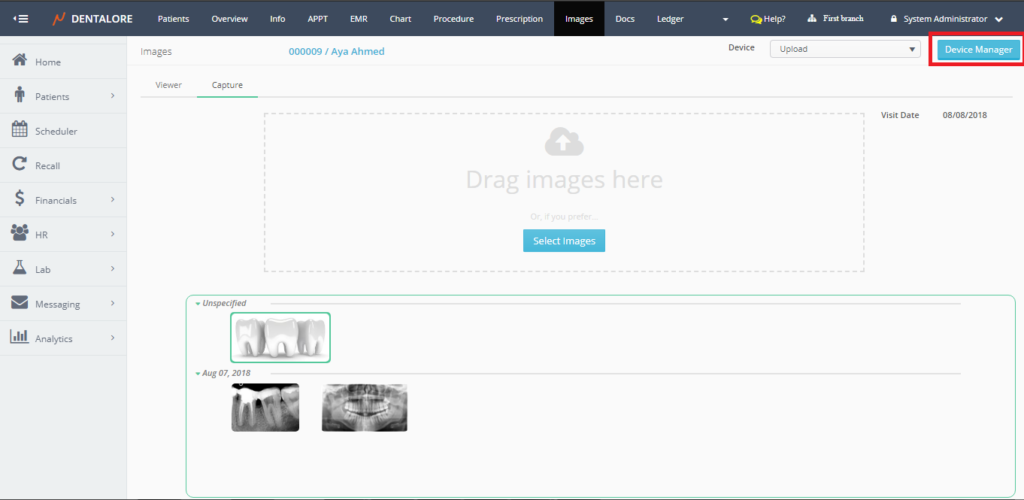
- Images tab opens by default on the Viewer tab, Select the “Capture” tab.
- From the “Capture” tab, Press the “Device Manager” button.
- Press “Add” button.
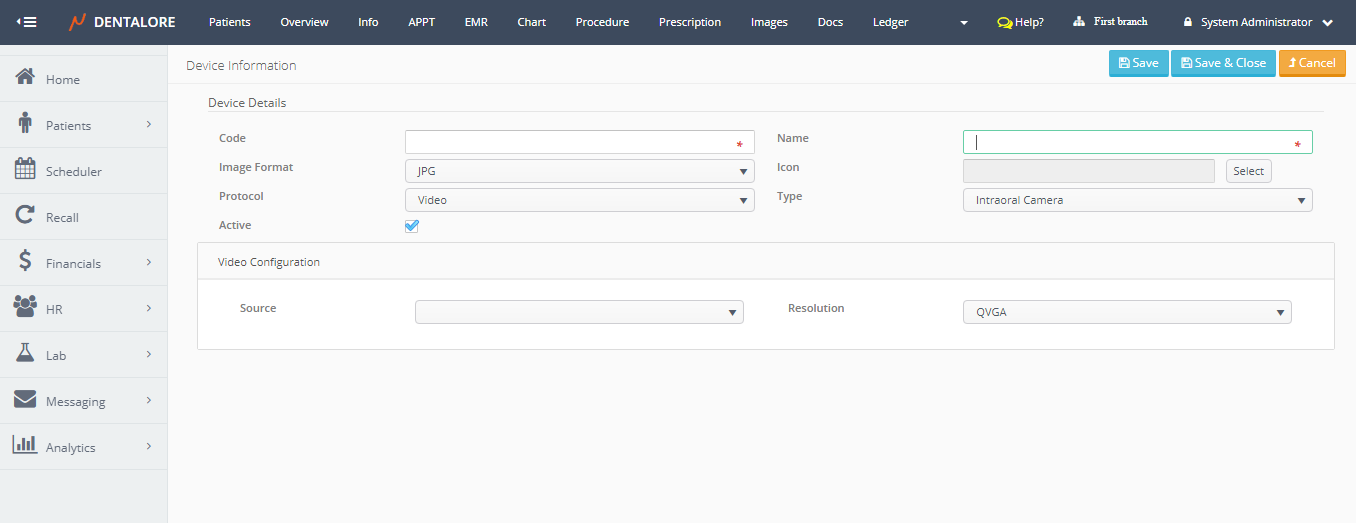
- New page “Device Information” opens.

- Insert the mandatory fields (Code and Name), and the format of image as required. and Select the protocol type to be (Bridge).
Note that: The protocol configuration section titled “Bridge Configuration” that displays the configurations of selected type from bridges’ protocols. - >> Note that: If “Dentalore Hub” is not installed on your computer, and user selects protocol to be “Bridge” then a popup appears to allow you to download and follow the steps to install the Hub. For more details about Dentalore Hub, Check: Installing Dentalore Hub.
- Dentalore System supports 4 different types of bridges, which are: (SIDEXIS, VixWin, DBSWIN, Sopro), each type of the existing bridges has it’s own configuration that is displayed in the “Bridge Configuration” section when a specific type is selected from the “Bridge Type” drop down menu.
>> In order to install a device that integrates with Dentalore system, Pleases contact our technical support team.
>> The “Save” button will save the new created device and keep the user on the same page.
>> The “Save & Close” button will save the new created device and the user will be directed to the main “Devices” main page that contains the devices grid view.
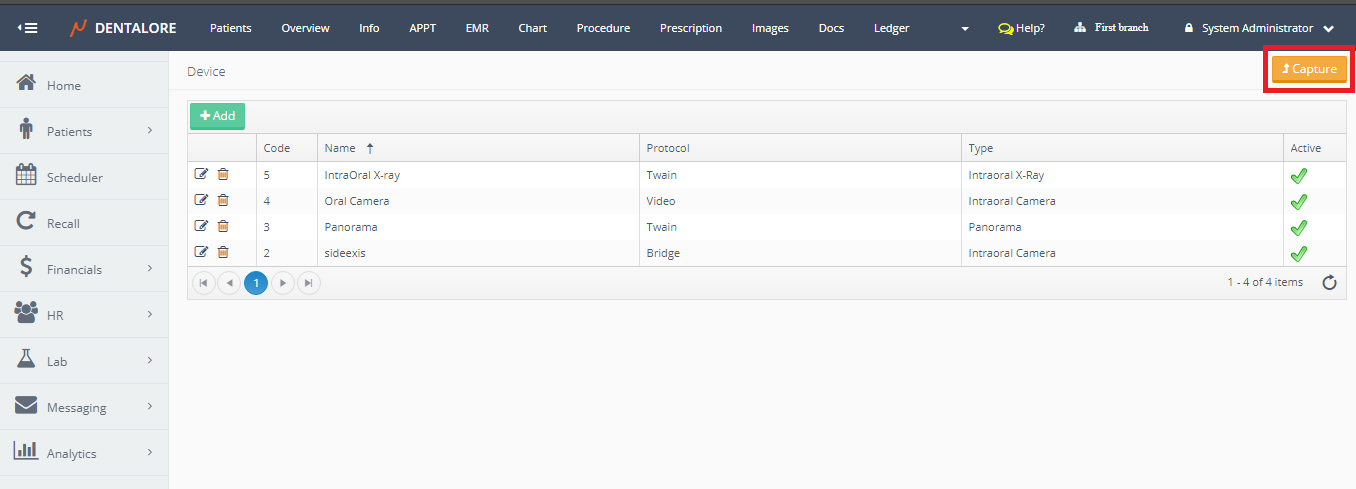
>> The “Cancel” button will cancel the creation of new device and user directed to the main “Devices” page. - Press “Save & Close” to check that device is successfully listed in the “Devices” grid view.


Capture Images from new device
- Press “Capture” to back to the “Capture” view in the Images module.

- From the “Capture” view, open the “Device” drop down menu, Check that the new created device exist and then select it.
Note that: The Default selection of “Device” drop down menu is the “Upload”.

- Once the new device is selected then the button related to the selected device appears in title which is the name of this device (As set while creating the device).

- Once the user press the button of new device the imaging modality opens and the following occurs:
— If selected patient is new and has no saved data on the imaging modality, then Dentalore system transfers the patient’s information to the imaging modality to create new patient on it and capture images.
— If selected patient already exists and has data saved on the imaging modality, then it directly opens the patient to capture images for him. - >> Note that: User could also deal with the imaging modality through “Bridge” from the Chart Module.

>> Note that: The name of new device is displayed on the button in “Chart” module, as in “Images” module. - Other bridge types work by the same way.